Home Improvement
How to Change a Quick Fix Into a Large Project 😬
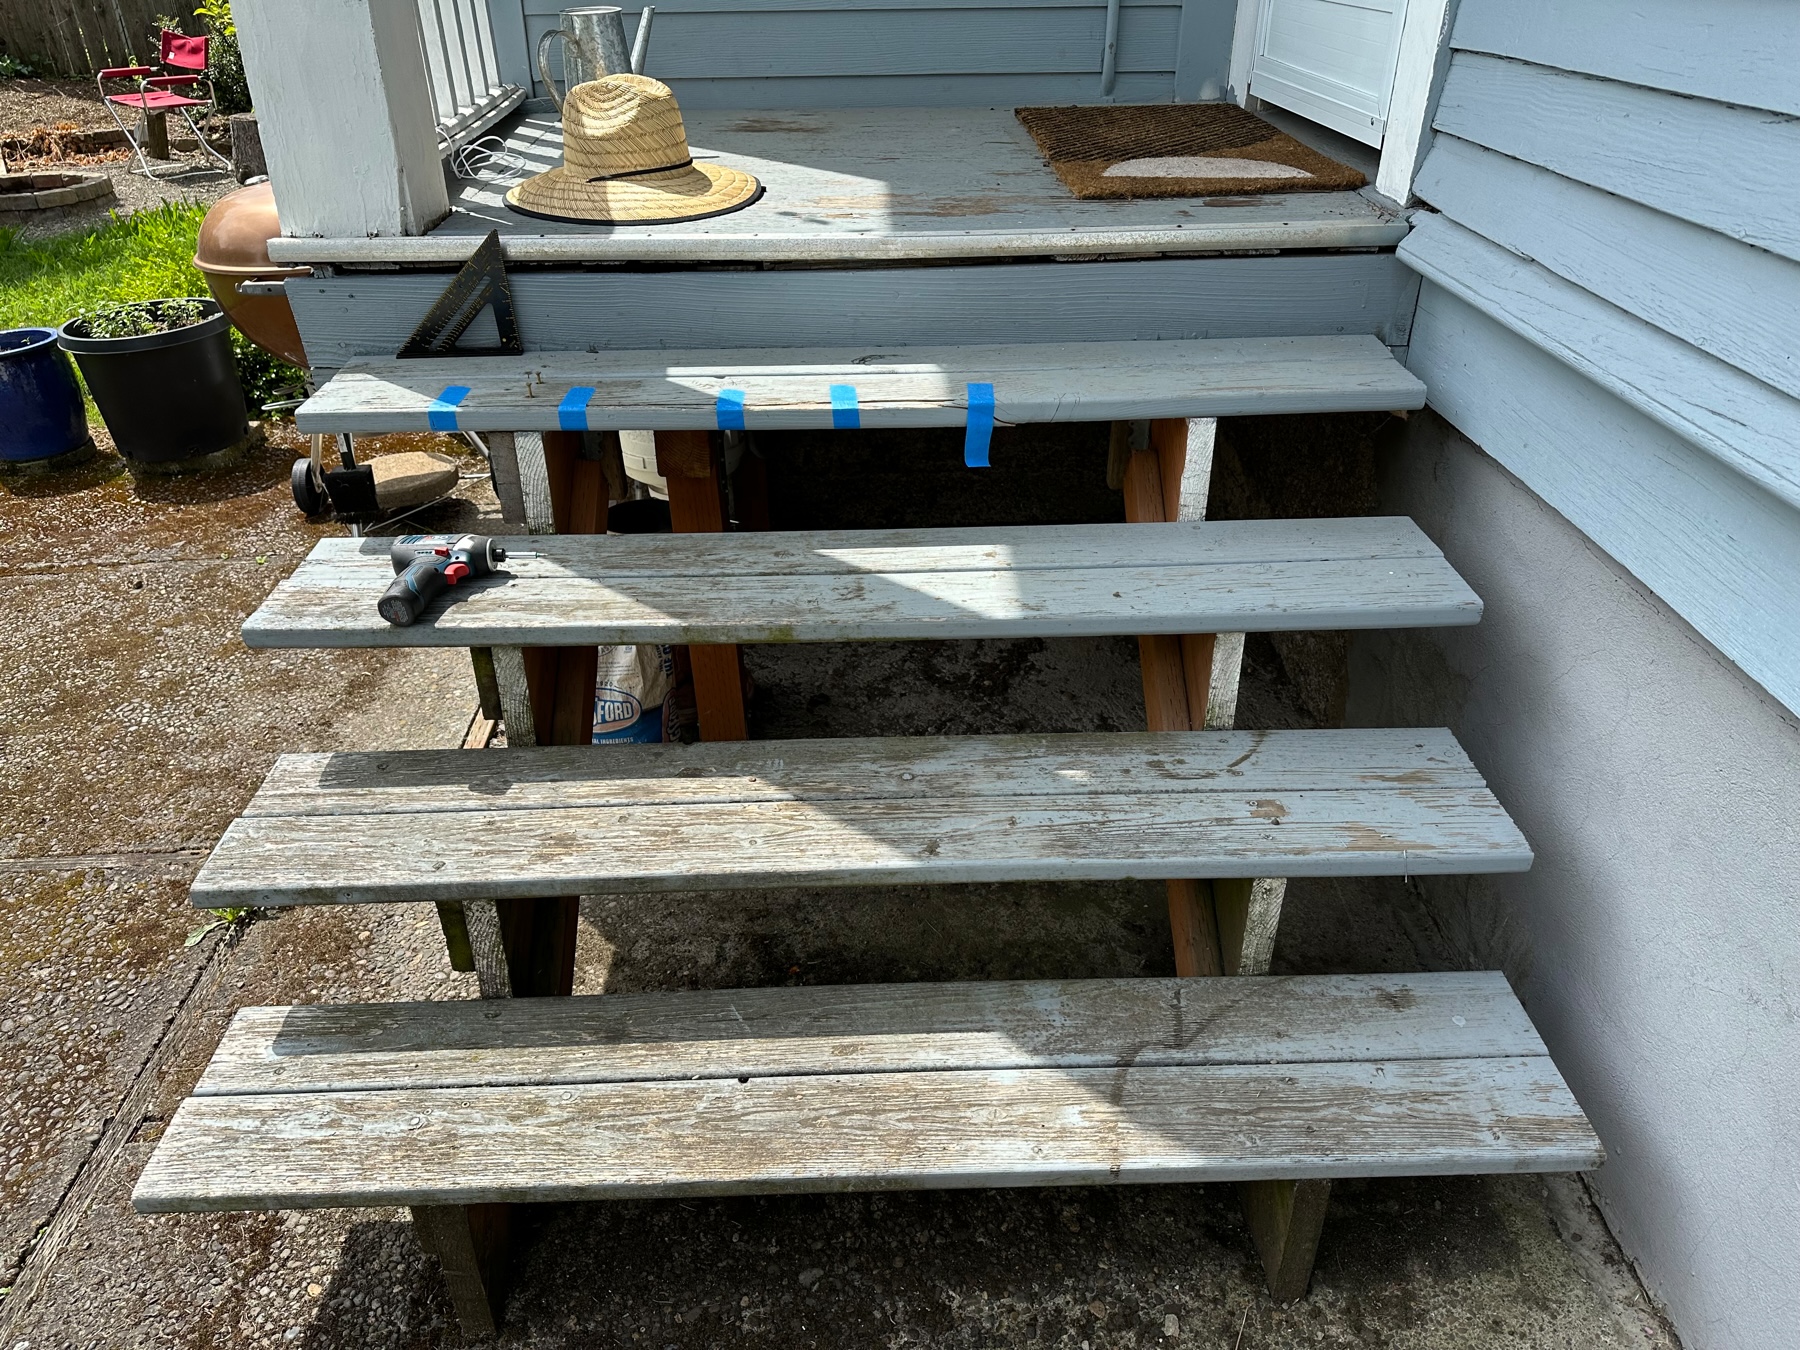
Our house has five steps to get down to the backyard. A few weeks ago, a board on the top step cracked on the edge. I added some blue tape to make it more visible until I got around to fixing it.
Soon thereafter I started working on a plan to fix it. The simplest thing would be to replace the board but many other boards are also not in good shape, so a fresh set would be best, especially since I may be getting some painting work done and a fresh coat on this could be added to that. Once I decided to go with that I felt like I had to address the fact that the treads are held up by two stringers, and there really ought to be three. This was starting to feel like yak shaving but I hadn’t taken on a project like this in a while and it was appealing to spend the time to do it right.
So my plan was to remove the treads, measure out a new stringer to go in the middle, cut it out of a 2x12, attach it and then put a whole bunch of fresh boards, probably also adding risers. After talking to friends and looking at some videos it seemed like reasonable idea.
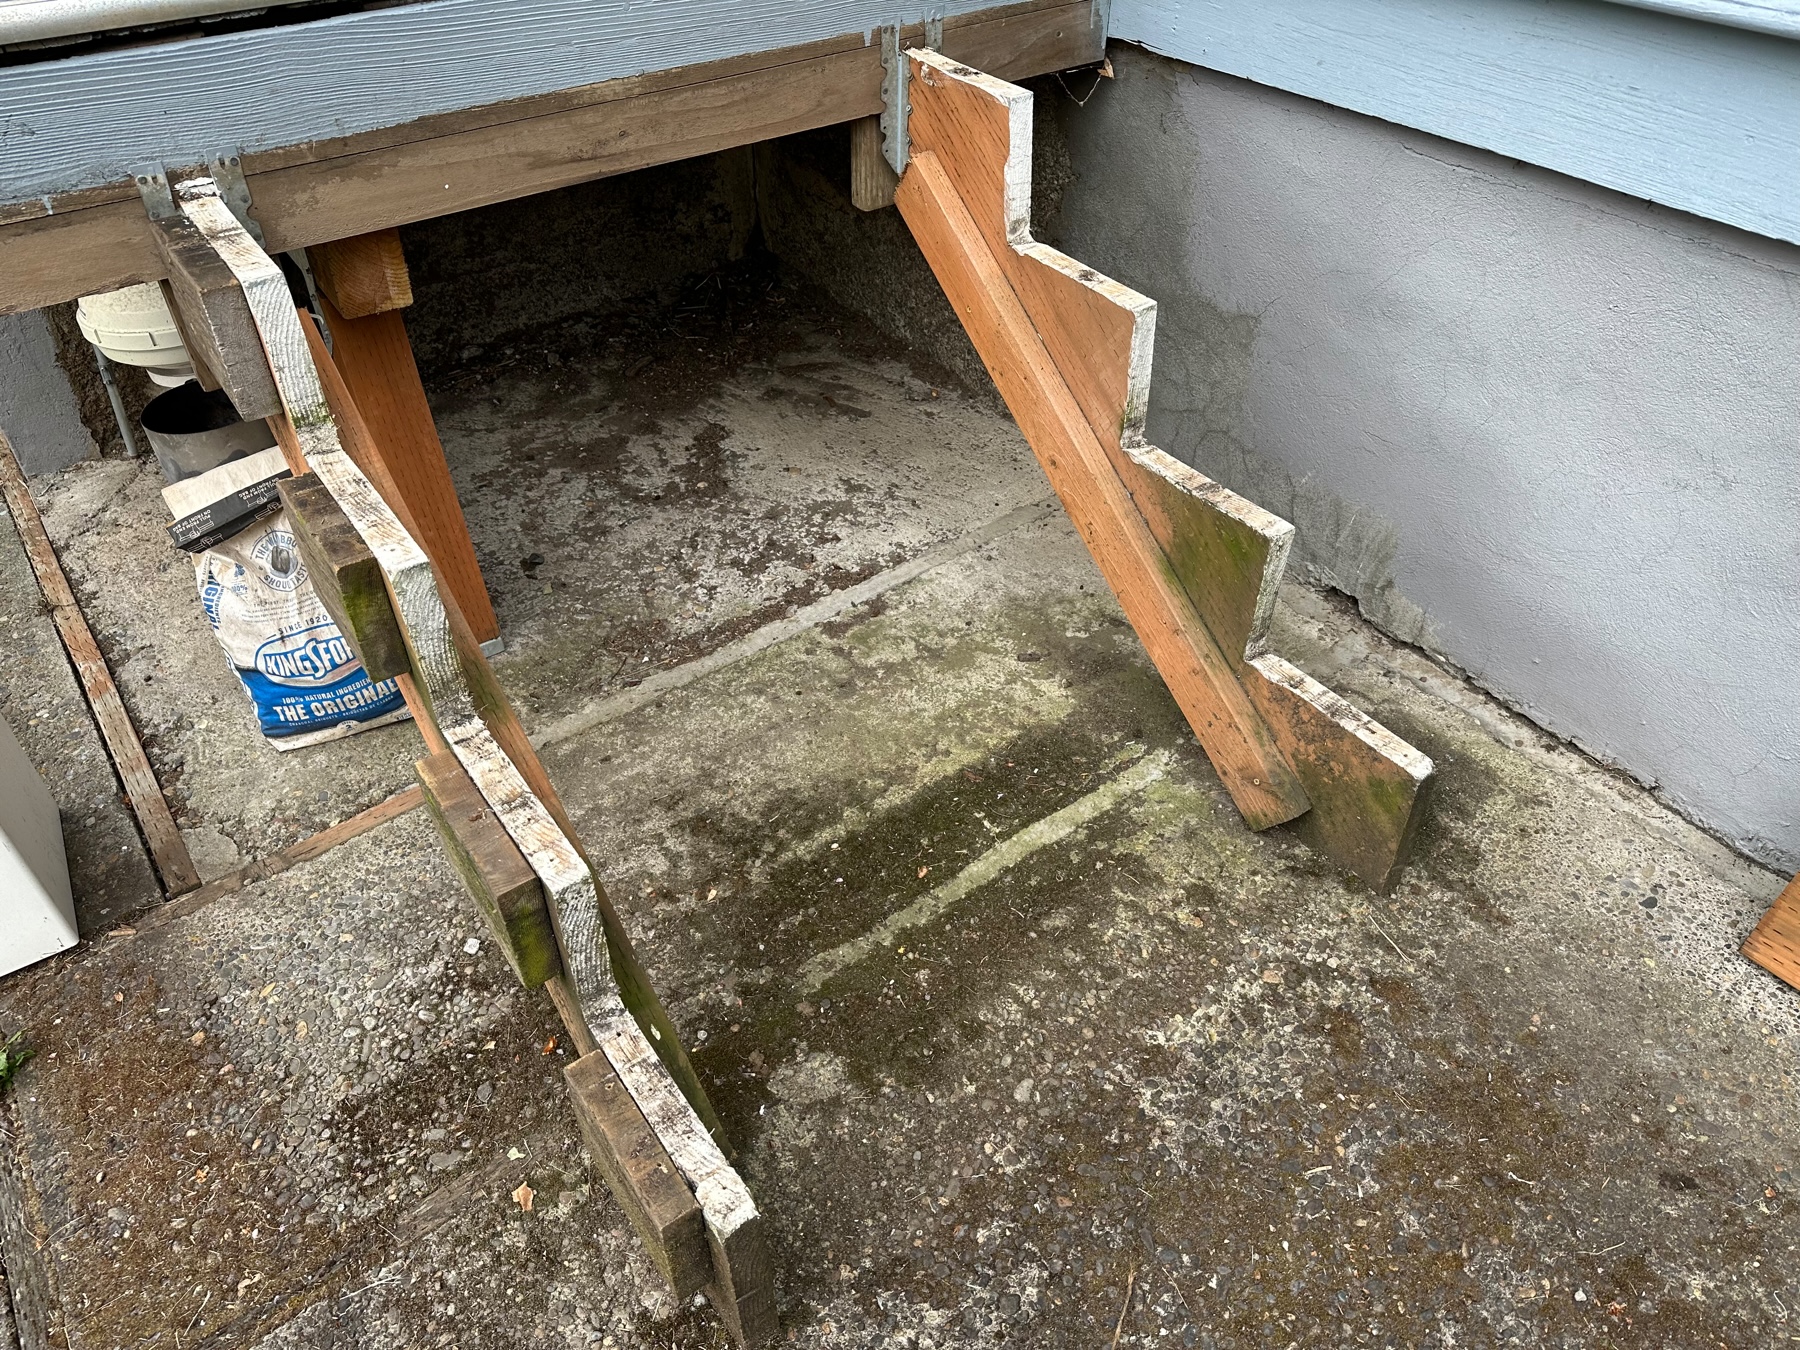
Yesterday I got to it. First I removed the treads. I noticed that the bottom of one stringer had a crack and was about to come apart. I drove a couple of screws to reattach it. This was the first new issue I noticed. I also noticed that each stringer was resting differently, the concrete seems to go around one, but under the other. That was the second new issue.
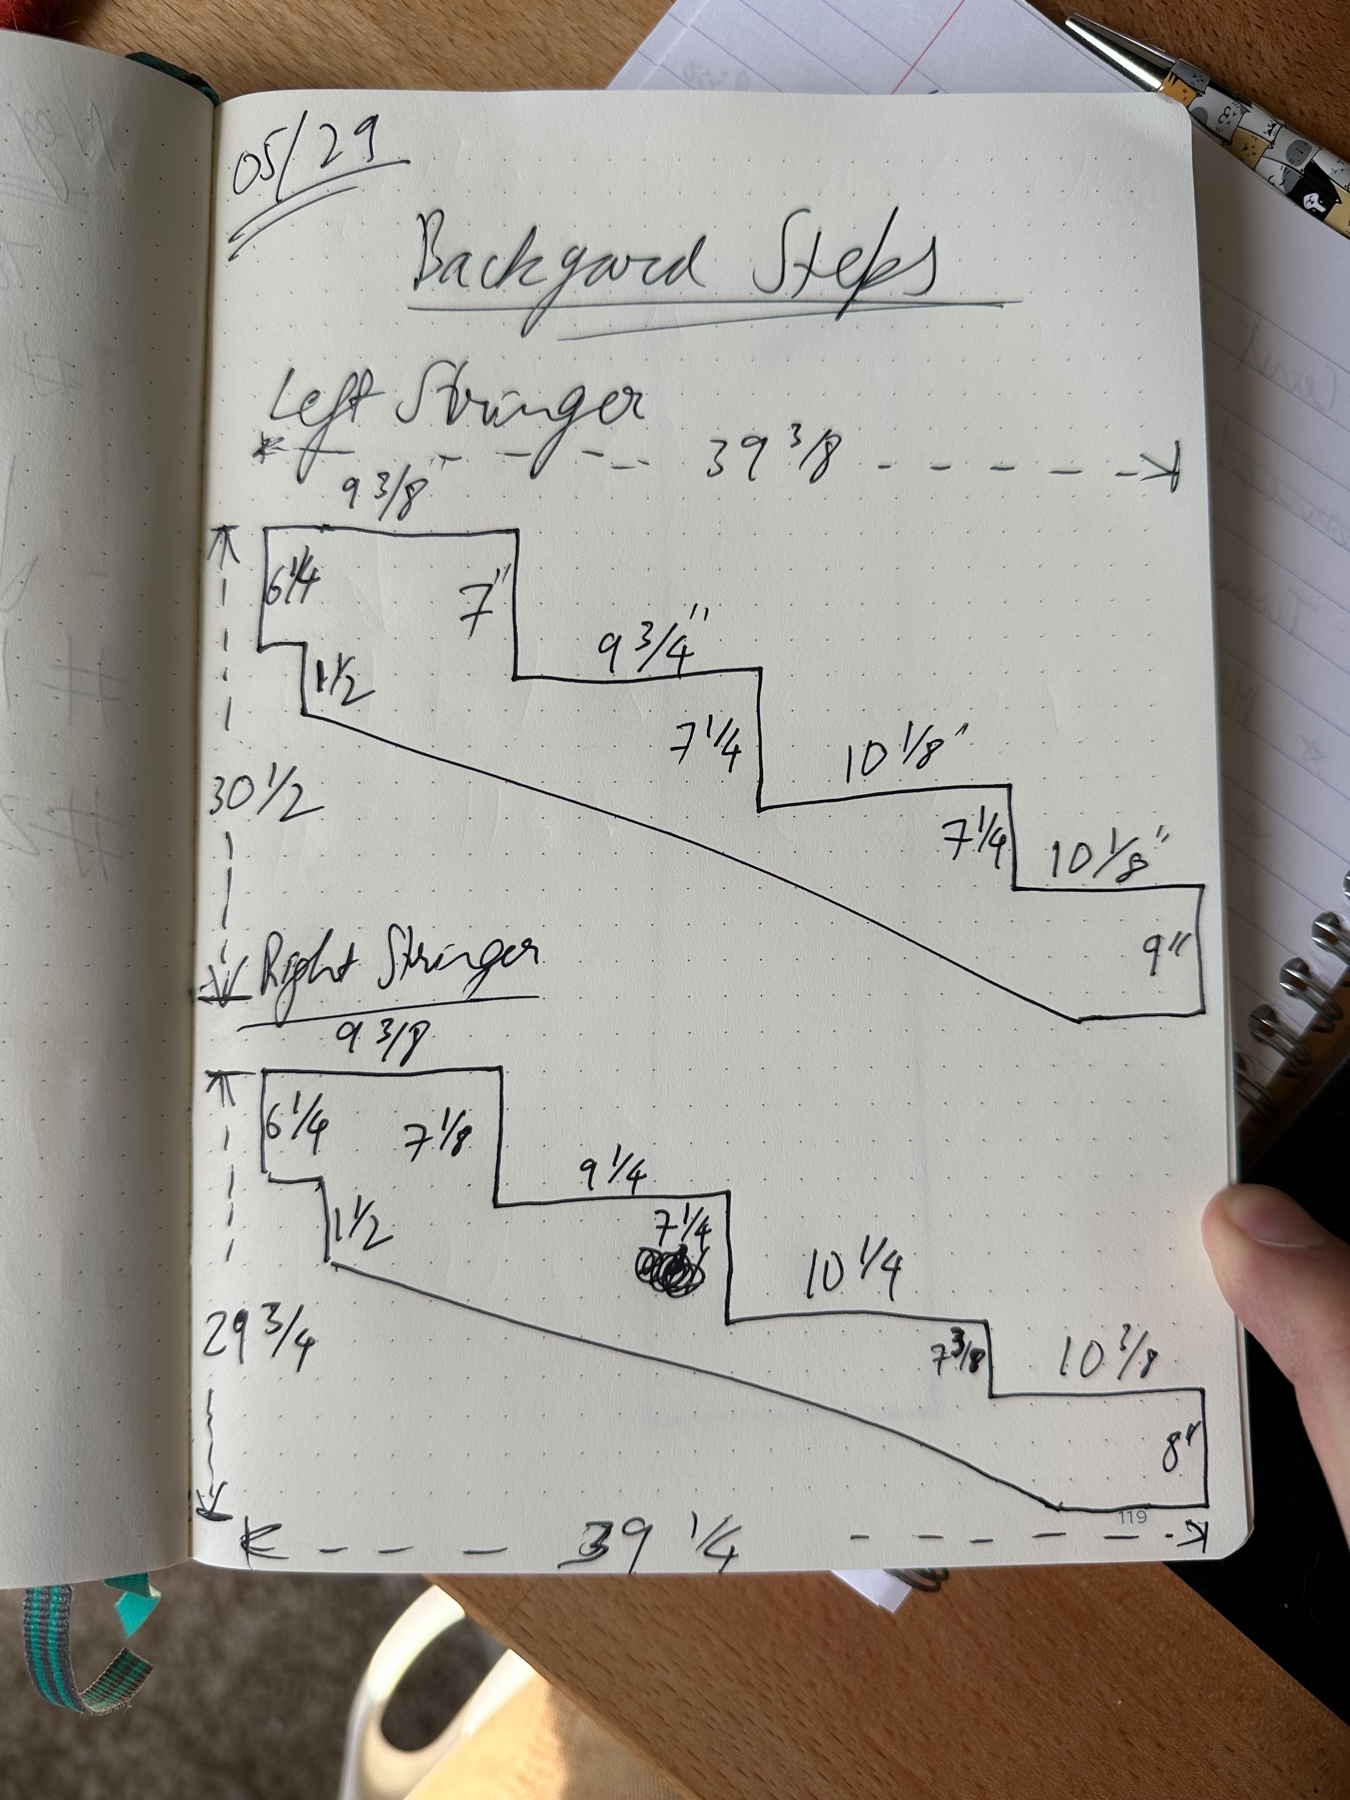
After removing the treads I measured out the stringers and this is what those measurements were like. As you can see, there is not much consistency between the two, including the fact that the first step from the ground was not only wildly higher than the others, it is also well over the building code. These were the third and fourth new issues.
Nevertheless I figured out measurements and marked it on the board but that didn’t look right. I did it again. Something was still off. I looked at the stringers closely and noticed a fifth new issue.
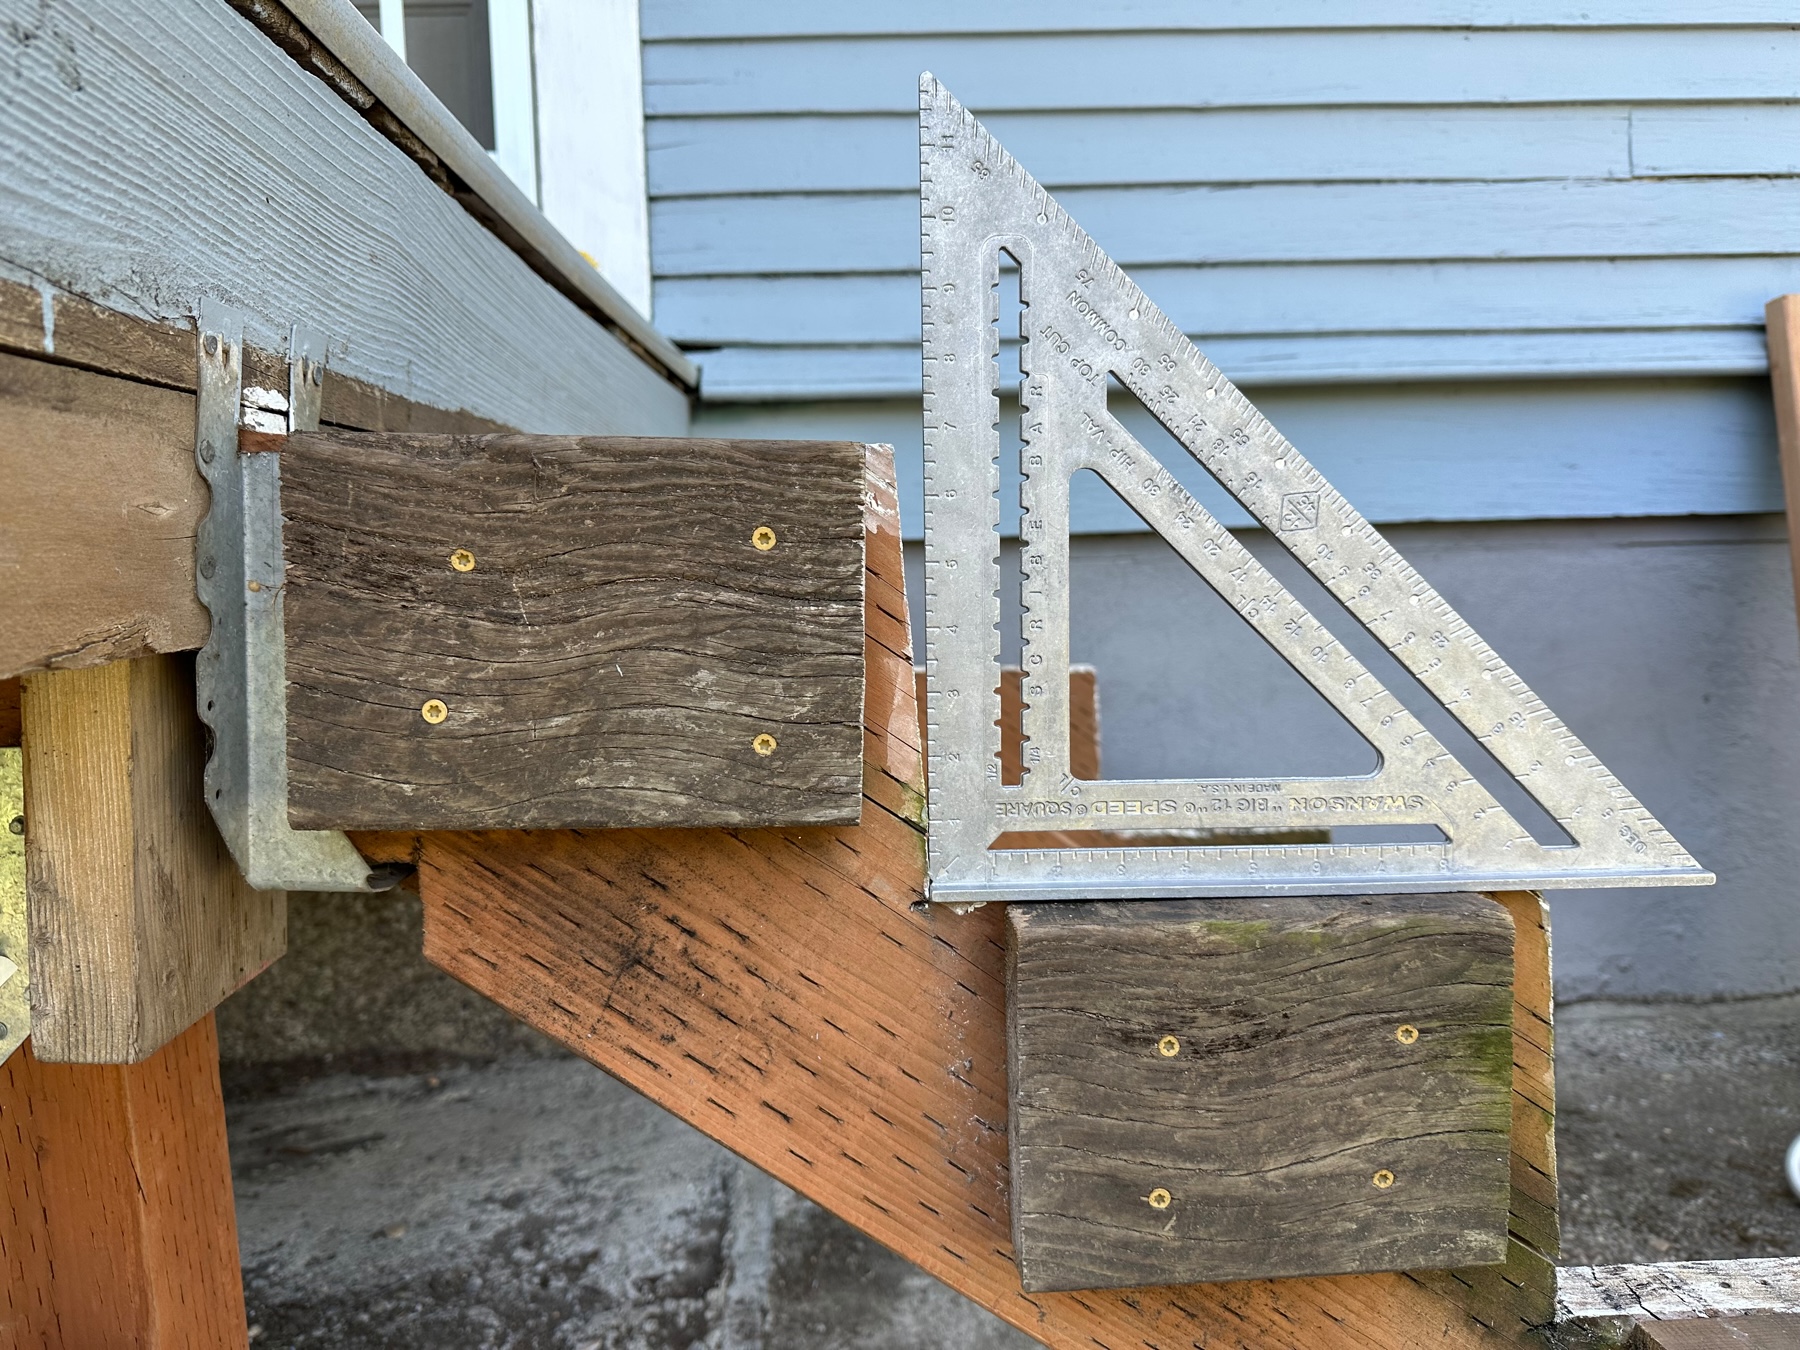
For whatever reason the builder had removed extra material from each corner of each stringer so the angles weren’t square. That was the last straw. At that point I decided that there were too many issues with leaving the existing structure intact and that the more reasonable thing would be to just rebuild the steps from scratch.
I put the treads back while moving the cracked board to the bottom tread so it was out of the way where it would cause any harm. I also cleaned it up a bit and applied wood glue for good measure. All of this is a temporary measure until these can be rebuilt either by me, or by someone I hire. Will report back after that!
Cookware Rack
A little over a year ago Jenni and I made this wall mounted cookware hanging rack.

We’ve been wanting a place to put our pans for a while It’s tedious to manage them in a drawer or cabinet, if you can even fit them in there. Often some would just stay on the stove and need to be moved out of the way when cooking. Whenever I would see pans hanging, in person or in a photo, it seemed like the best solution. We had space on only one wall in the kitchen, so that decision was easy.
Pans can be heavy and our walls are lathe and plaster, so mounting just about anywhere was out of the question. And so the construction method was narrowed down to boards mounted to studs, with hardware to hang the pans.
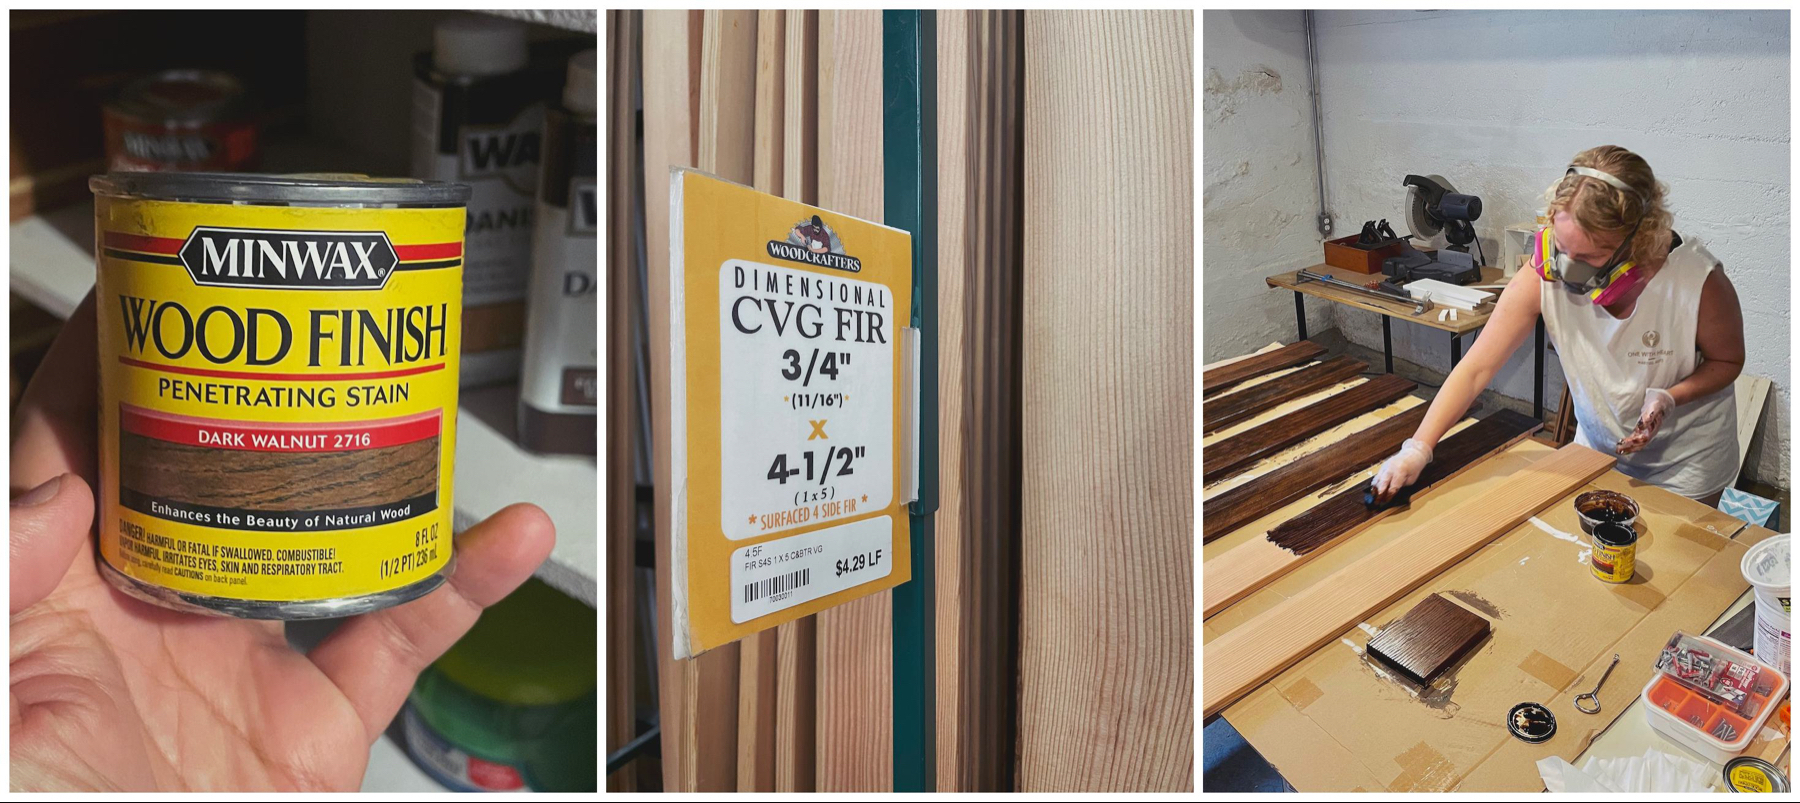
We went to the amazing local woodworking store where they have finished dimensional lumber and narrowed down our choice based primarily on cost. We wanted a dark color, and I already had dark walnut stain from the mail and keys organizer I made a while back.
Back home, I cut the boards to length. We wanted a tight fit and the two ends, door frame and wall, weren’t super plumb so there were a lot of measurements and dry fitting before we had a set of boards that were just right. It was time to apply the stain and let it rest.
After that it was a straightforward process of screwing in the boards to the studs while using a couple of small blocks to space them evenly.
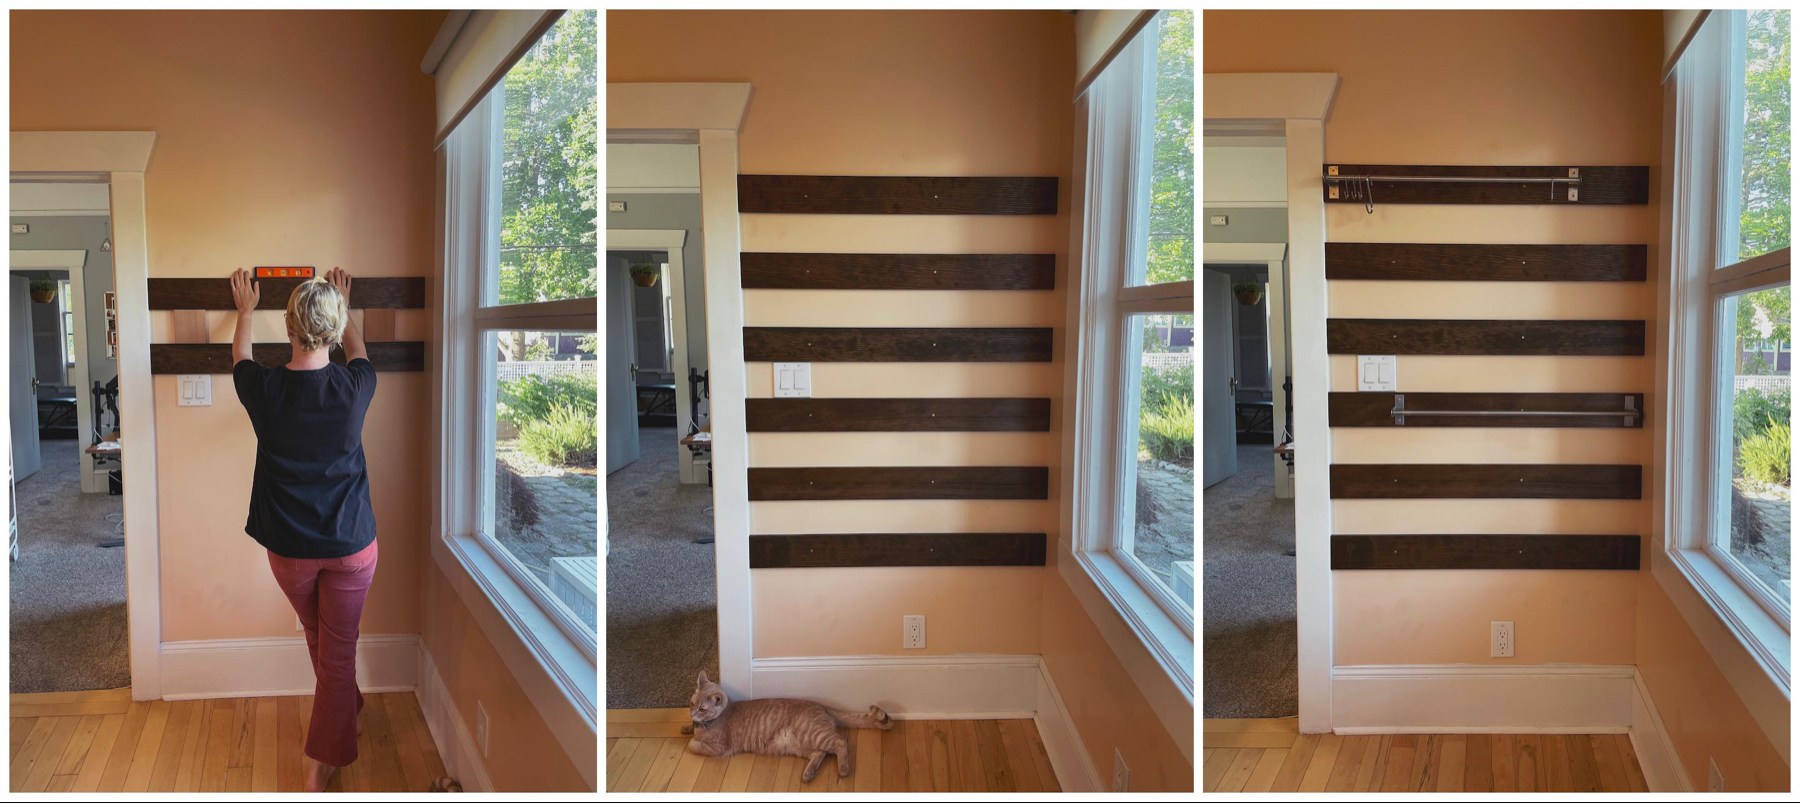
Once that was done, we installed a couple of IKEA rails that we had and the rack was ready to use. In the days that followed we sourced some nice hooks and Jenni put up a couple of planters and some homegrown produce.
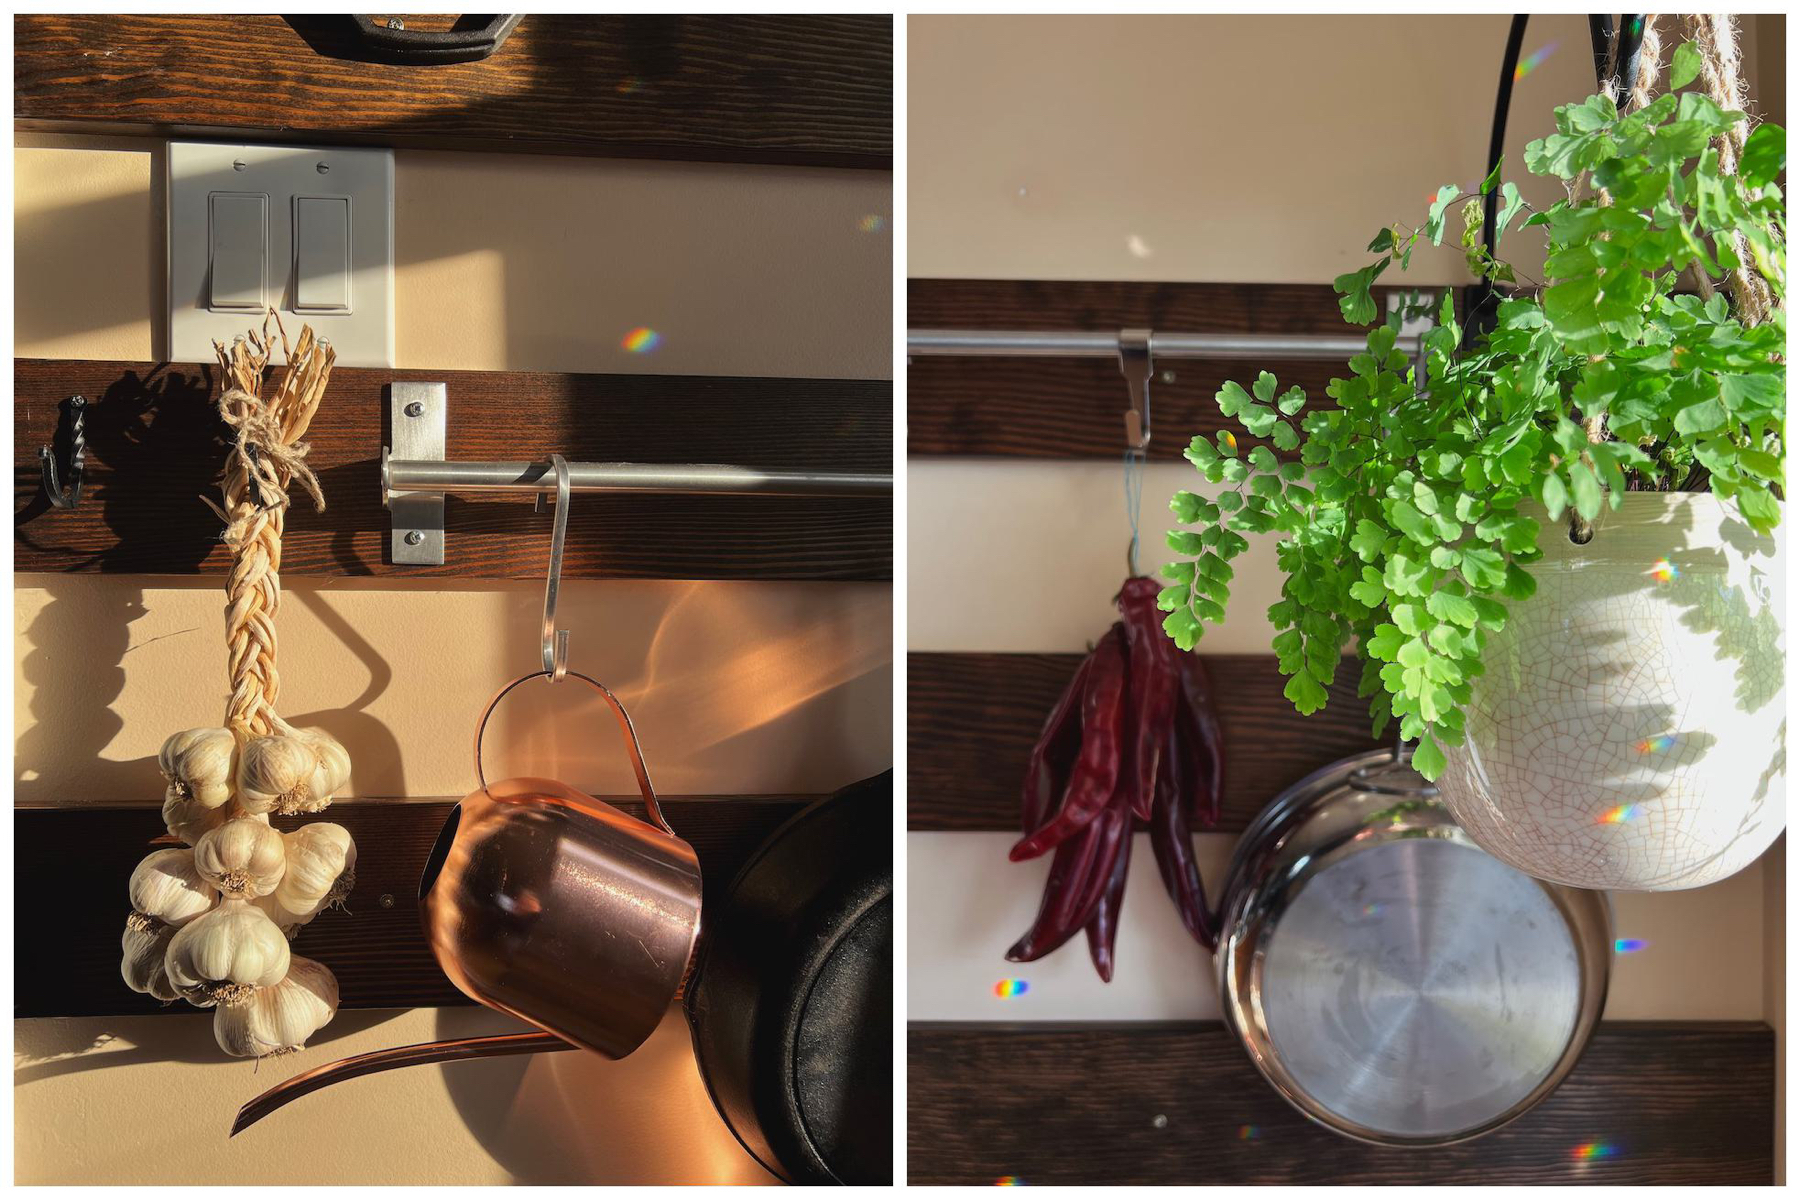
It’s been over a year and this has totally been worth it. I highly recommend utilizing vertical space in the kitchen where you can.
P.S. This blog post should’ve been written about a year ago. Anyway, it’s been written now.
Upload images using Mimi.
Over the last week I framed and installed a window in the shed in our yard.
As part of this project, I also started using a “real” video editor. I’ve edited videos in the past using iMovie, but this was quite different, as expected, and it was fun to pick up a lot of the beginner level skills in the process.
The editor I used was DaVinci Resolve, mostly because it has a version available for free and it is a very capable app for video editing on the Mac.
I watched a YouTube video to learn how to get going and to get familiar with the interface. Then I would search when I wanted to figure out how to do something specific as I went along e.g. extracting a frame to use as a thumbnail.
Update: 18th May, 2022.
A couple of weeks ago I finally got around to putting a frame on the window.
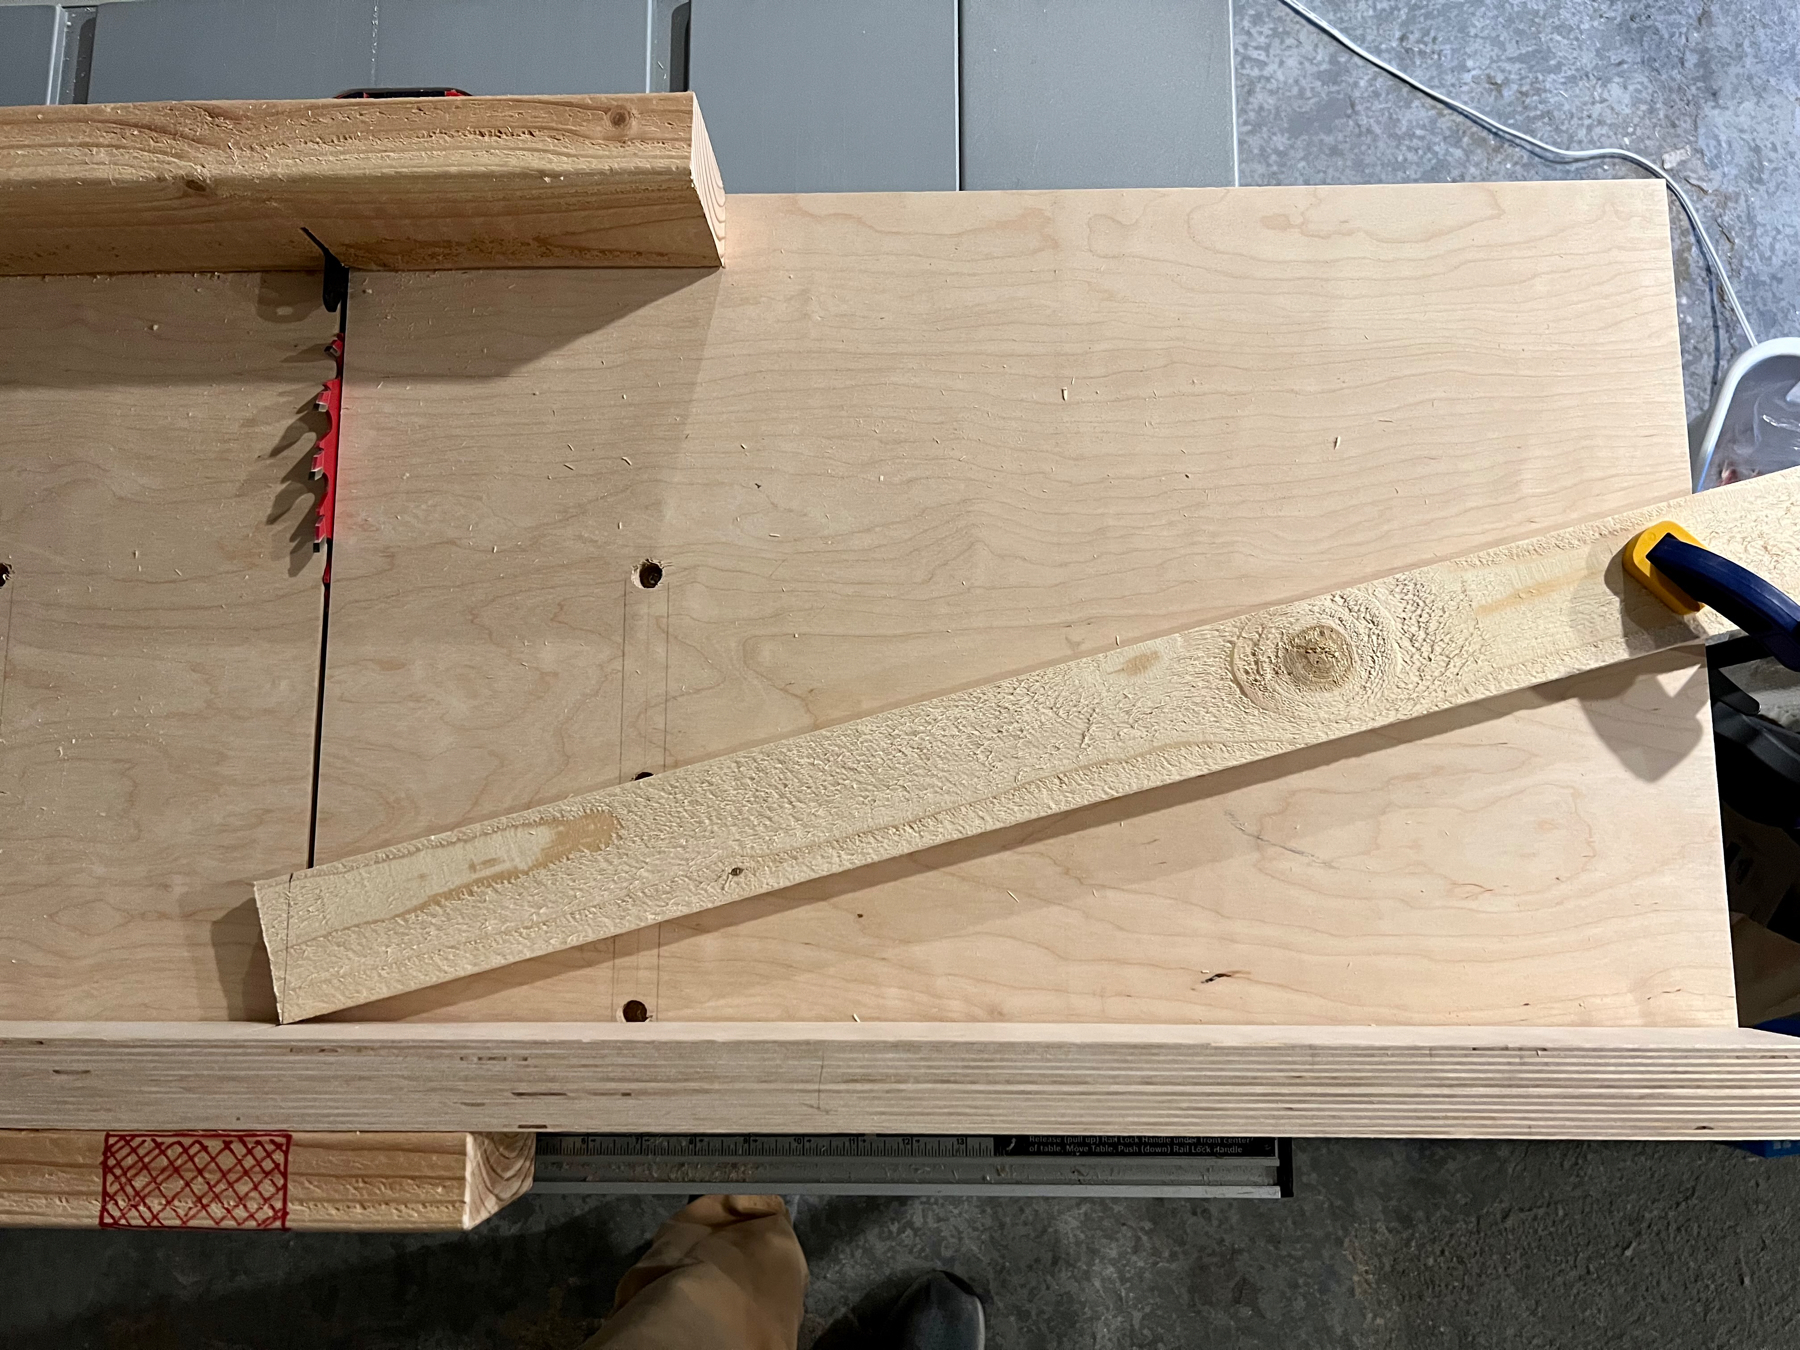
The other window on the shed has angled ends on the top piece, so I measured and mirrored them on the top piece of this one. I cut it on the table saw as shown in the photo below.
And here’s a photo of the window with the frame.
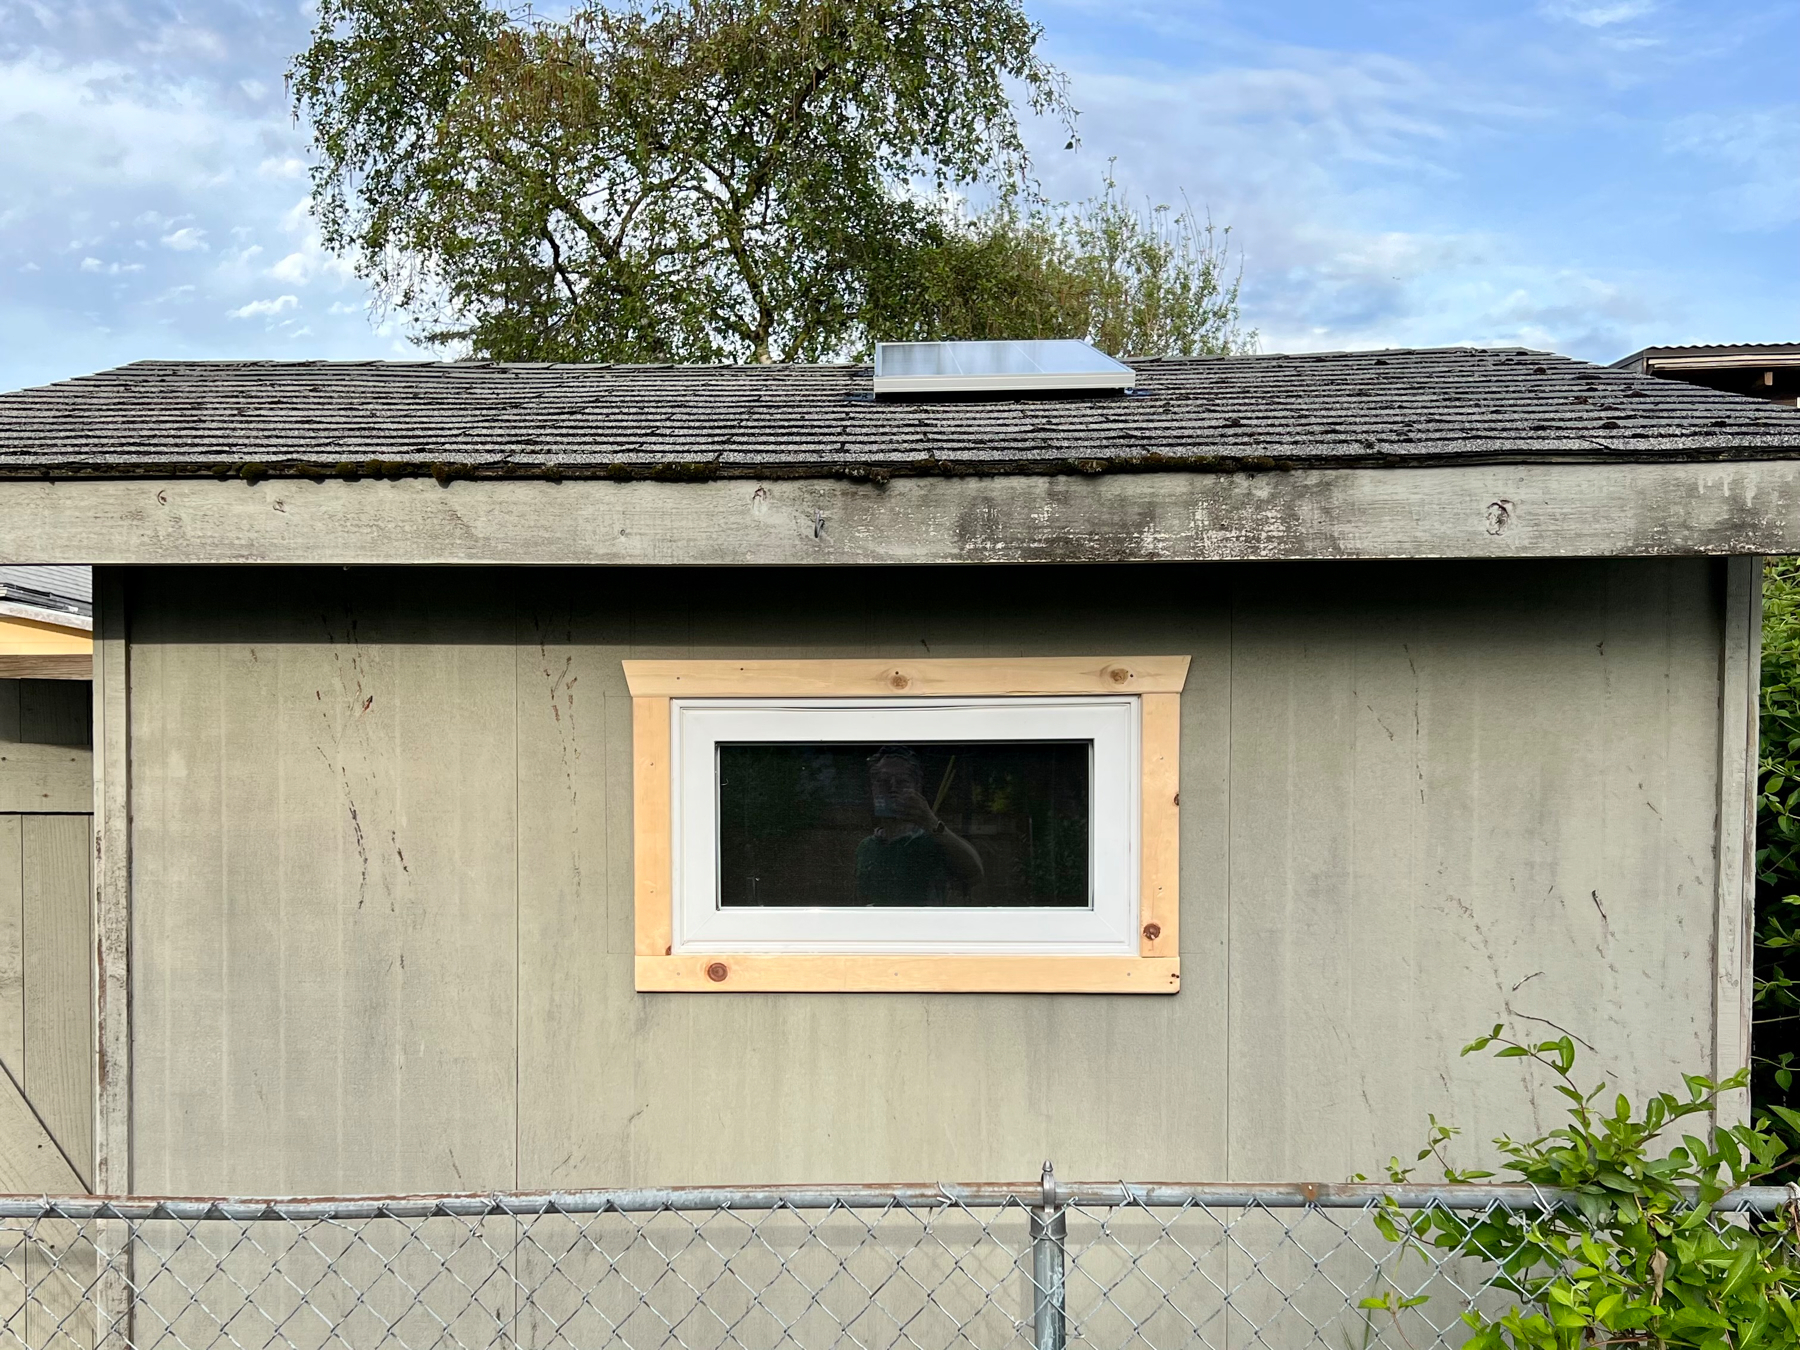
Maybe next month I’ll get around to painting it…
Upload images using Mimi.
New Fence and Pergola
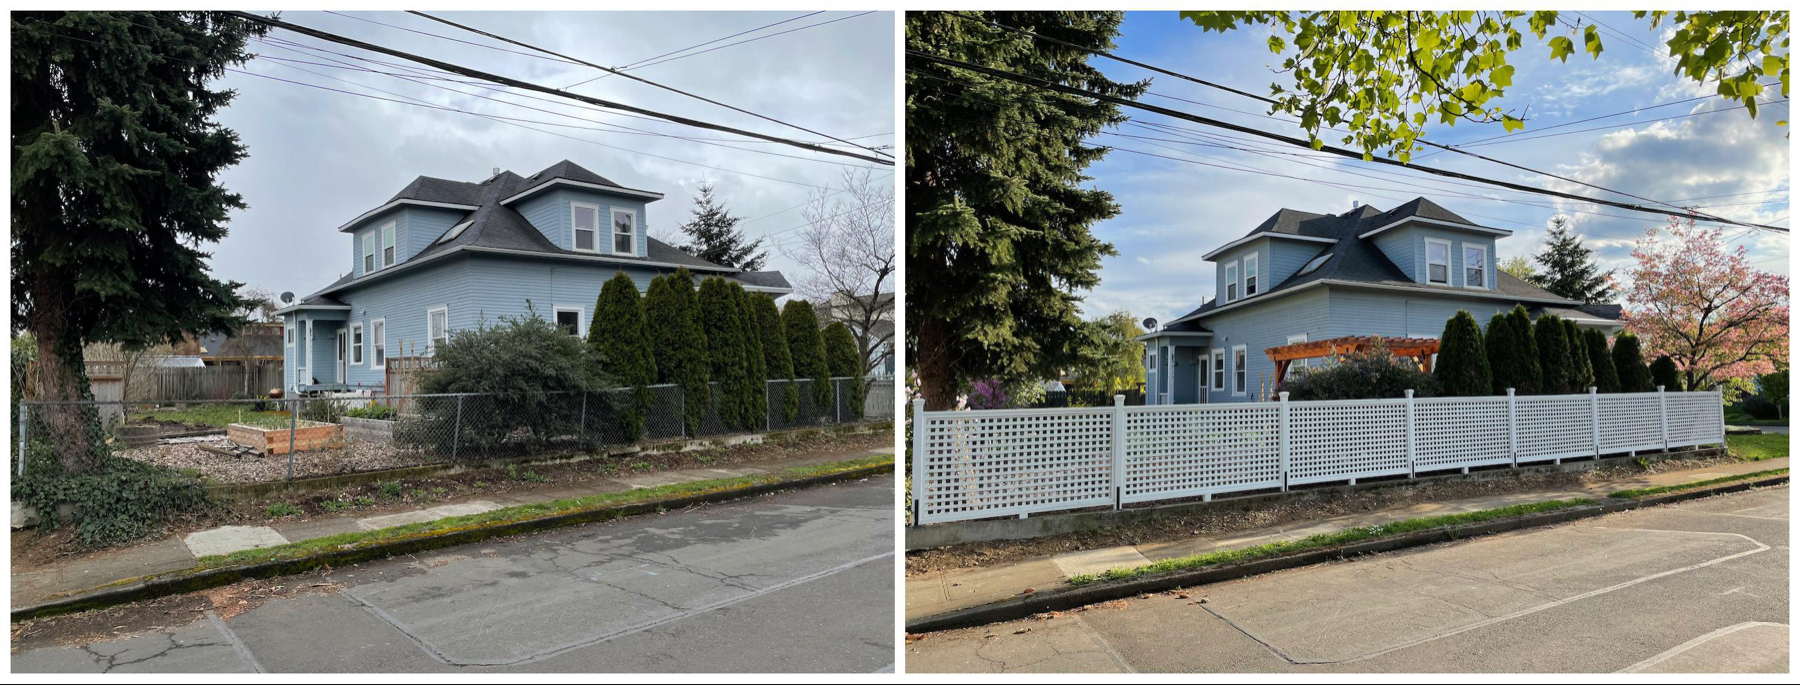
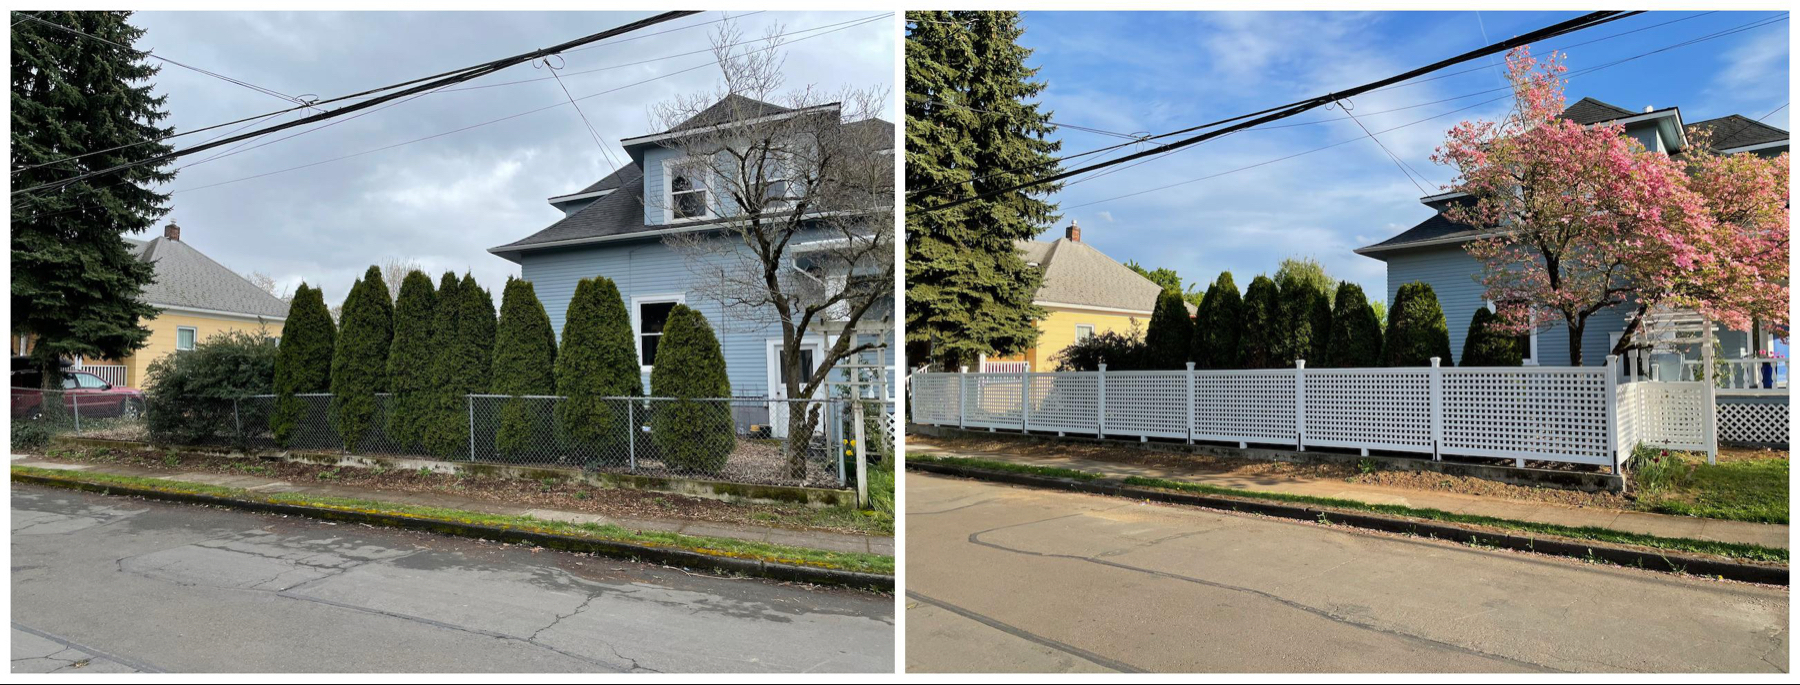
We recently replaced an old failing fence with a new one, and also got a pergola built. I took before and after pictures, and it’s really nice to see the improvement.
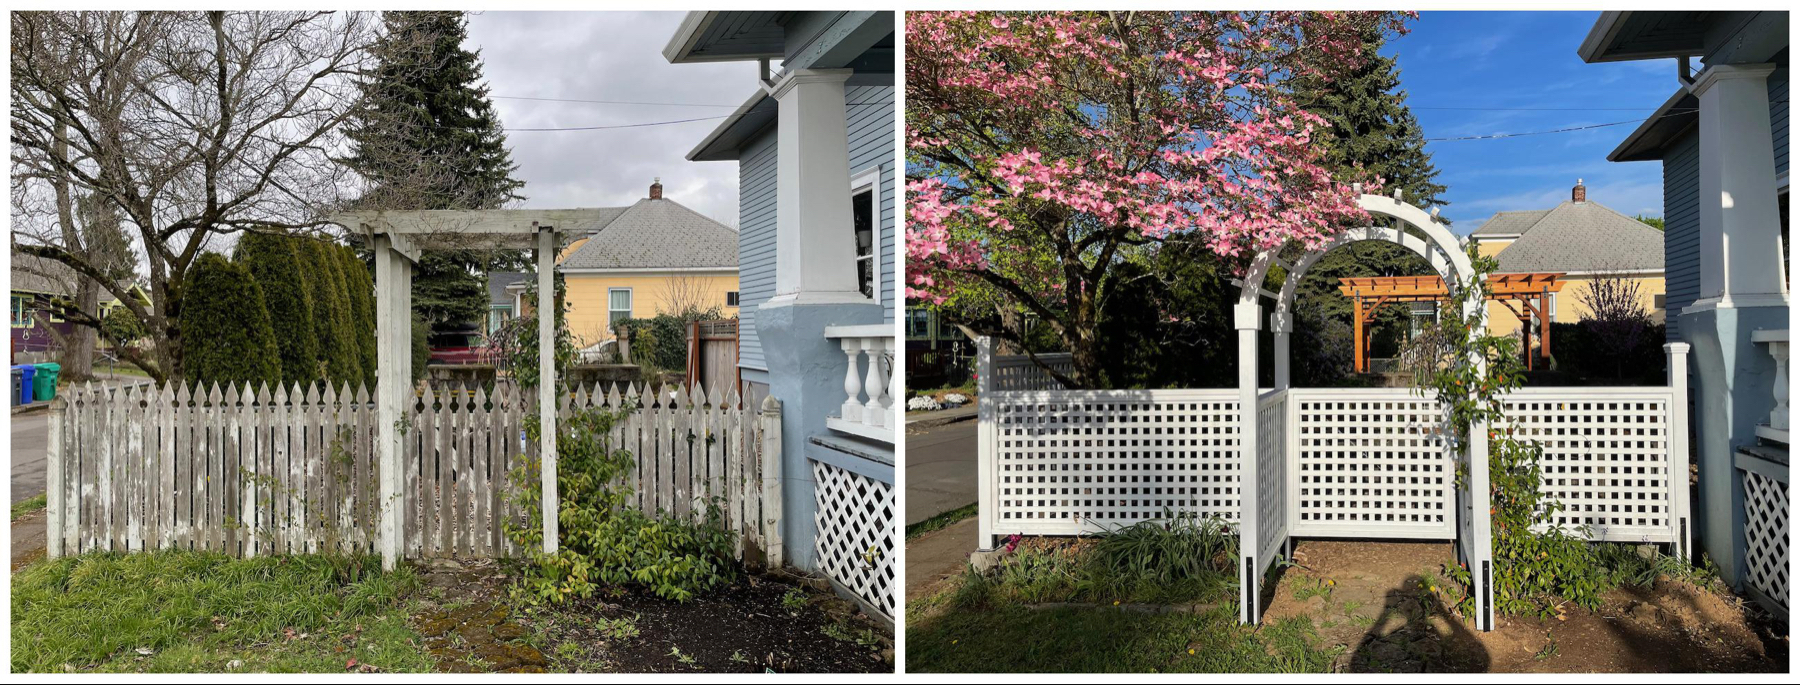
And here is a photo of the pergola that is in the garden, adjacent to the fence. It is a really nice space and we’ve been enjoying using it, and look forward to spending more time there, even with friends!
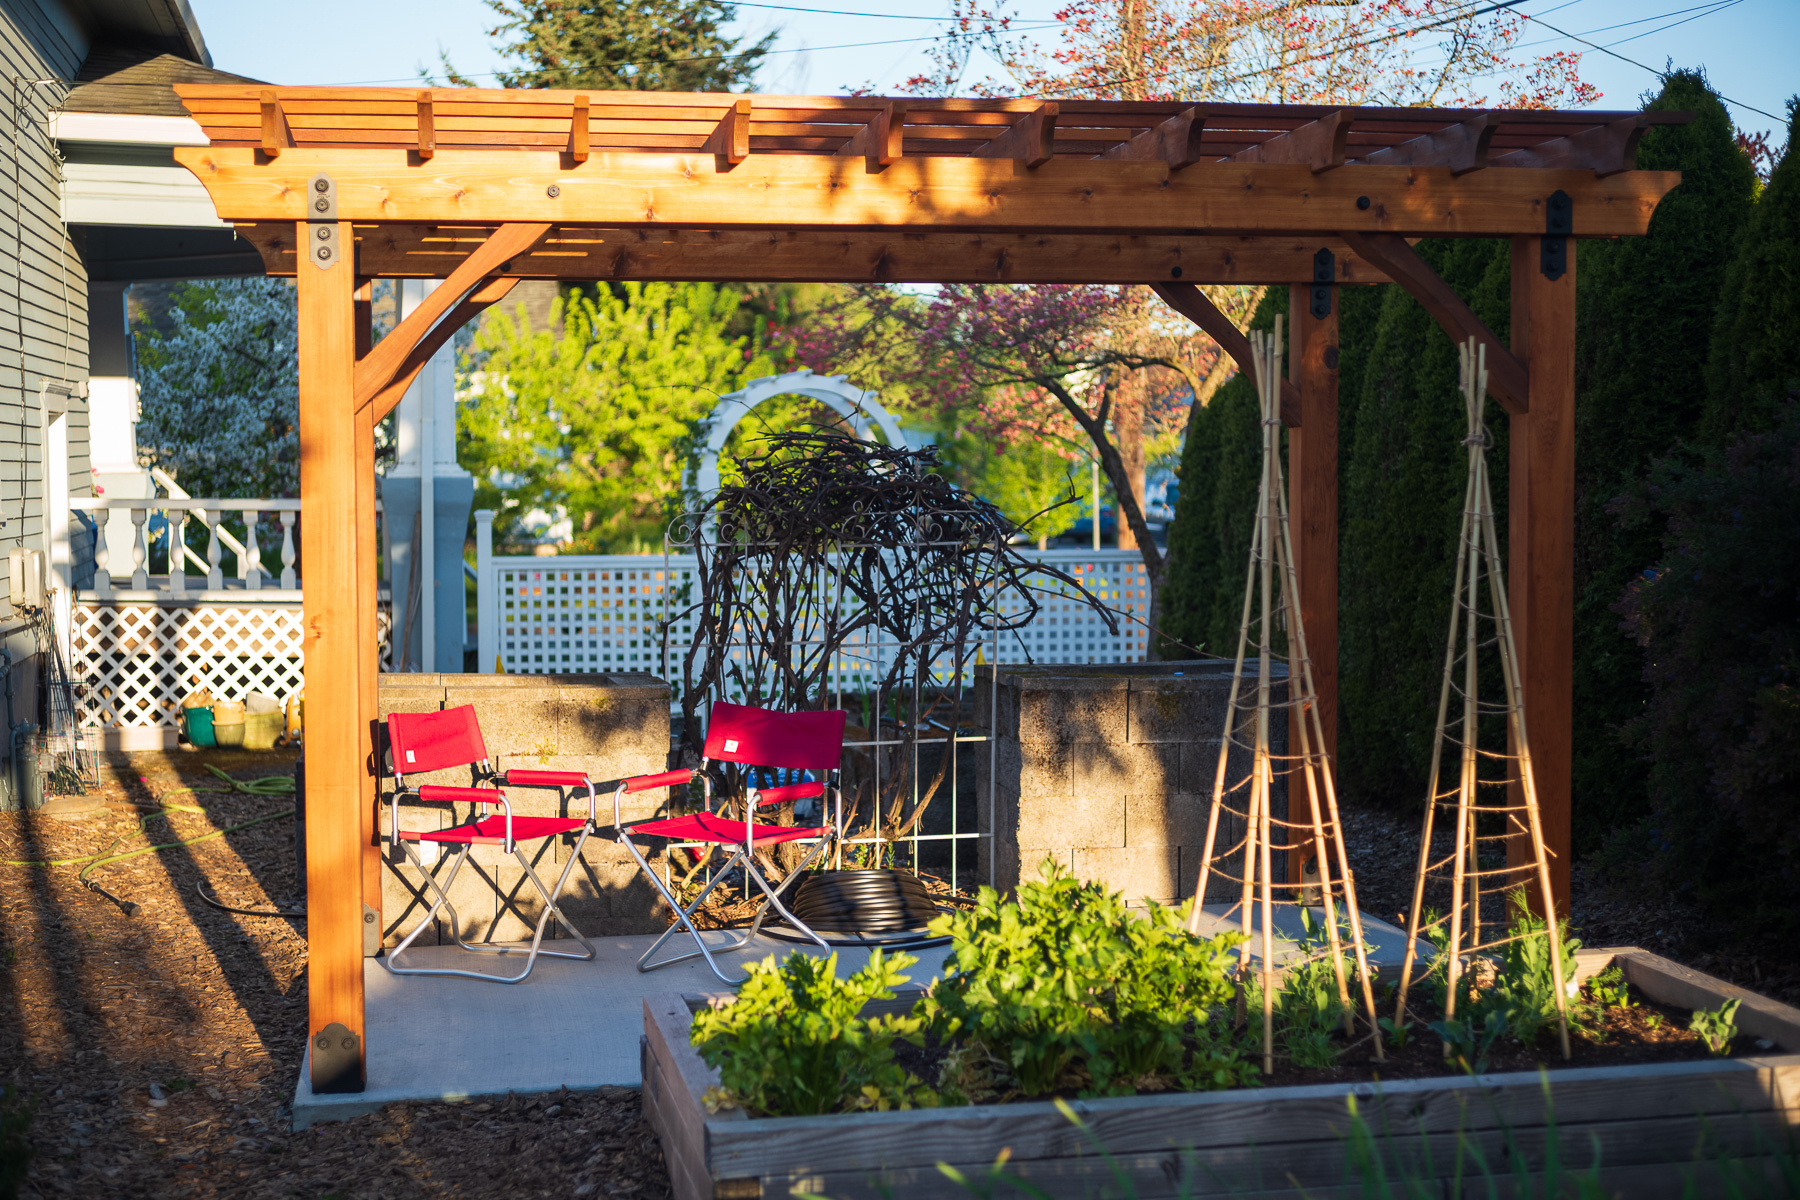
If you’re local to Portland, these projects were done by Chris Sanderson, and I gladly recommend him for your projects.
Images uploaded using Mimi.
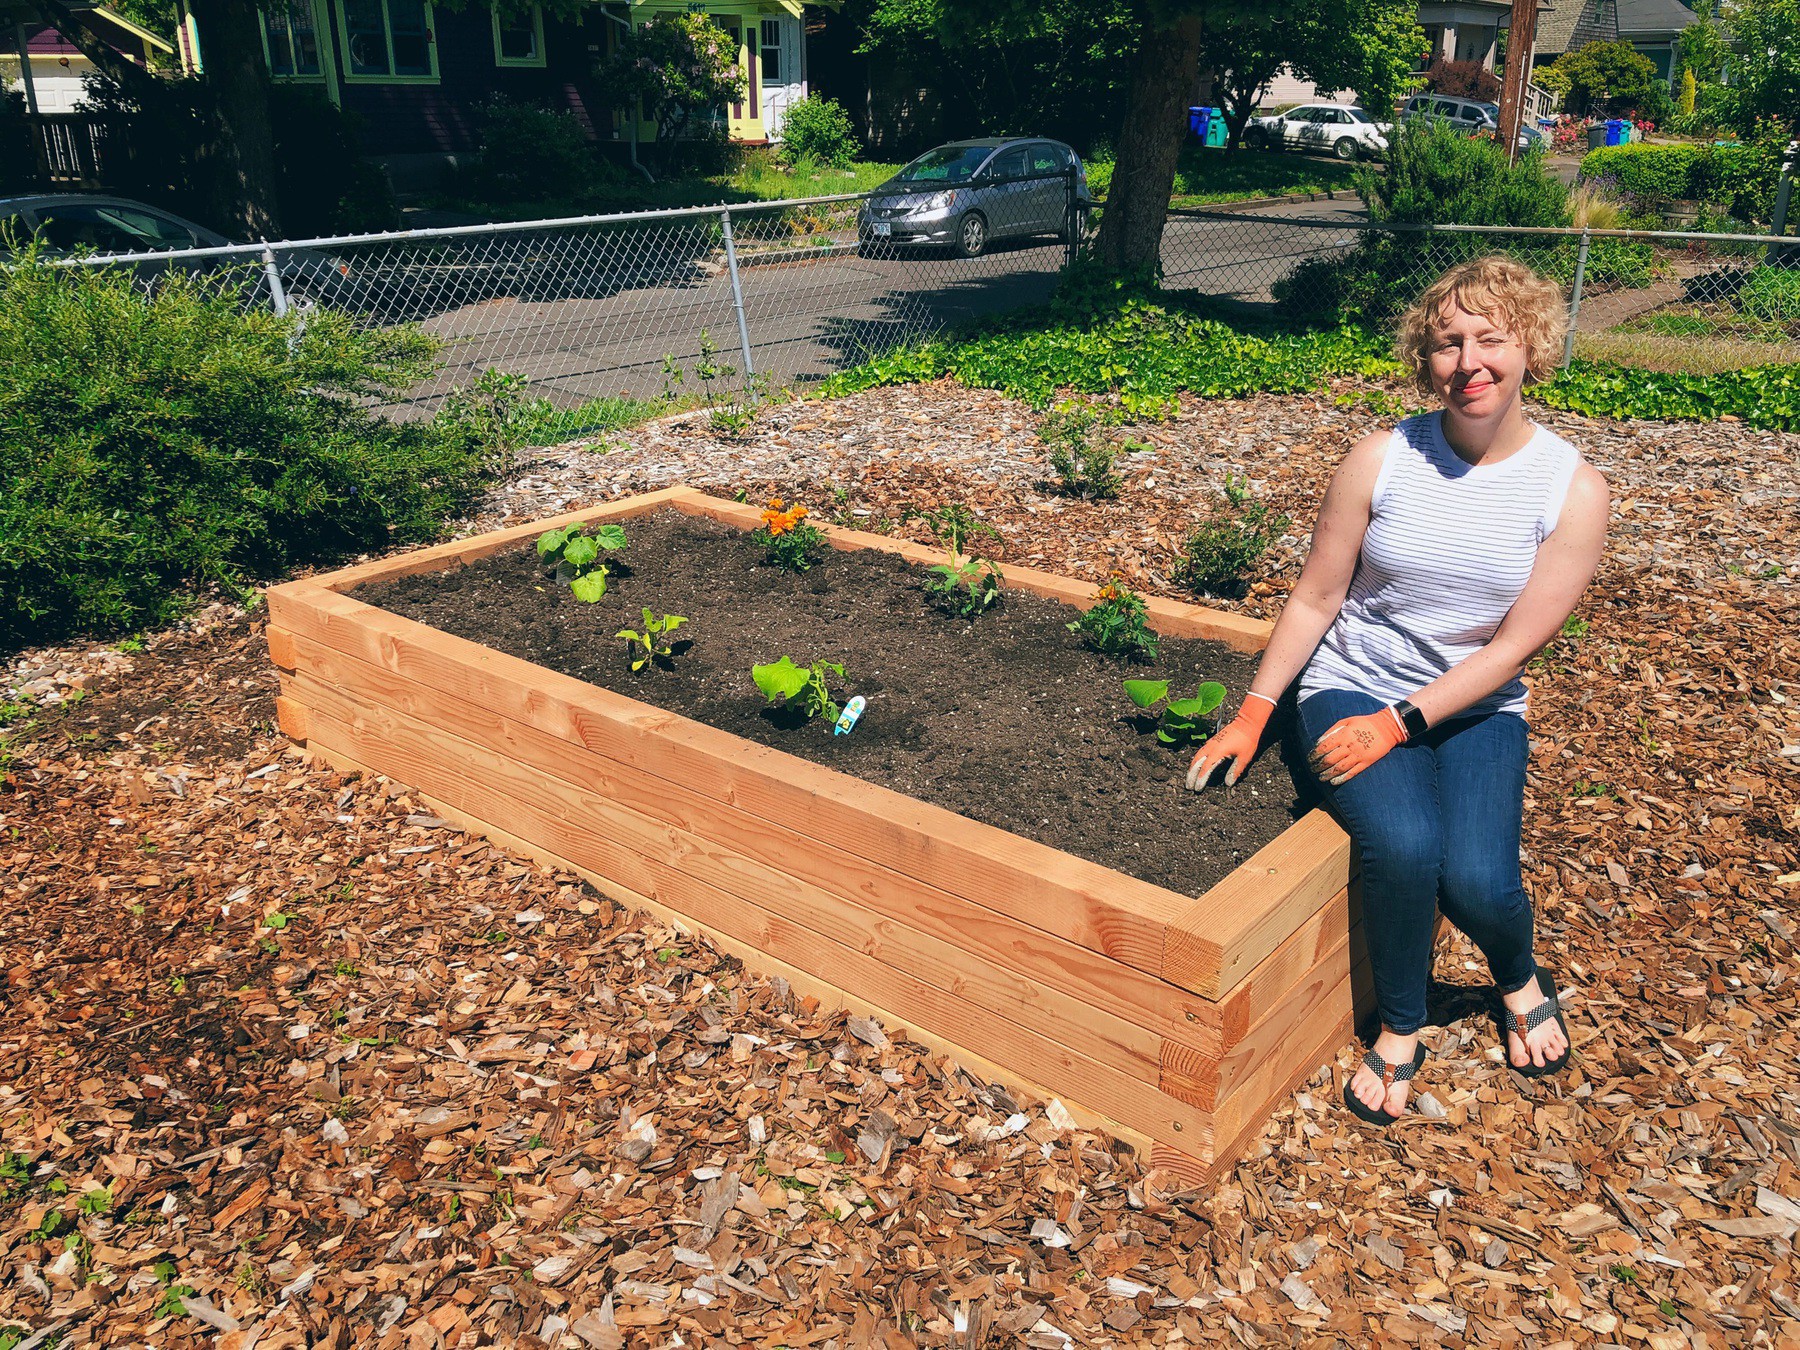
A New Gardening Bed
Last year we built a gardening bed in the spring and used it for summer vegetables and for garlic over the winter. A bed in that region of our yard did a lot better than our existing beds, especially for tomatoes, so we decided that we would build a new one next to it in 2020.
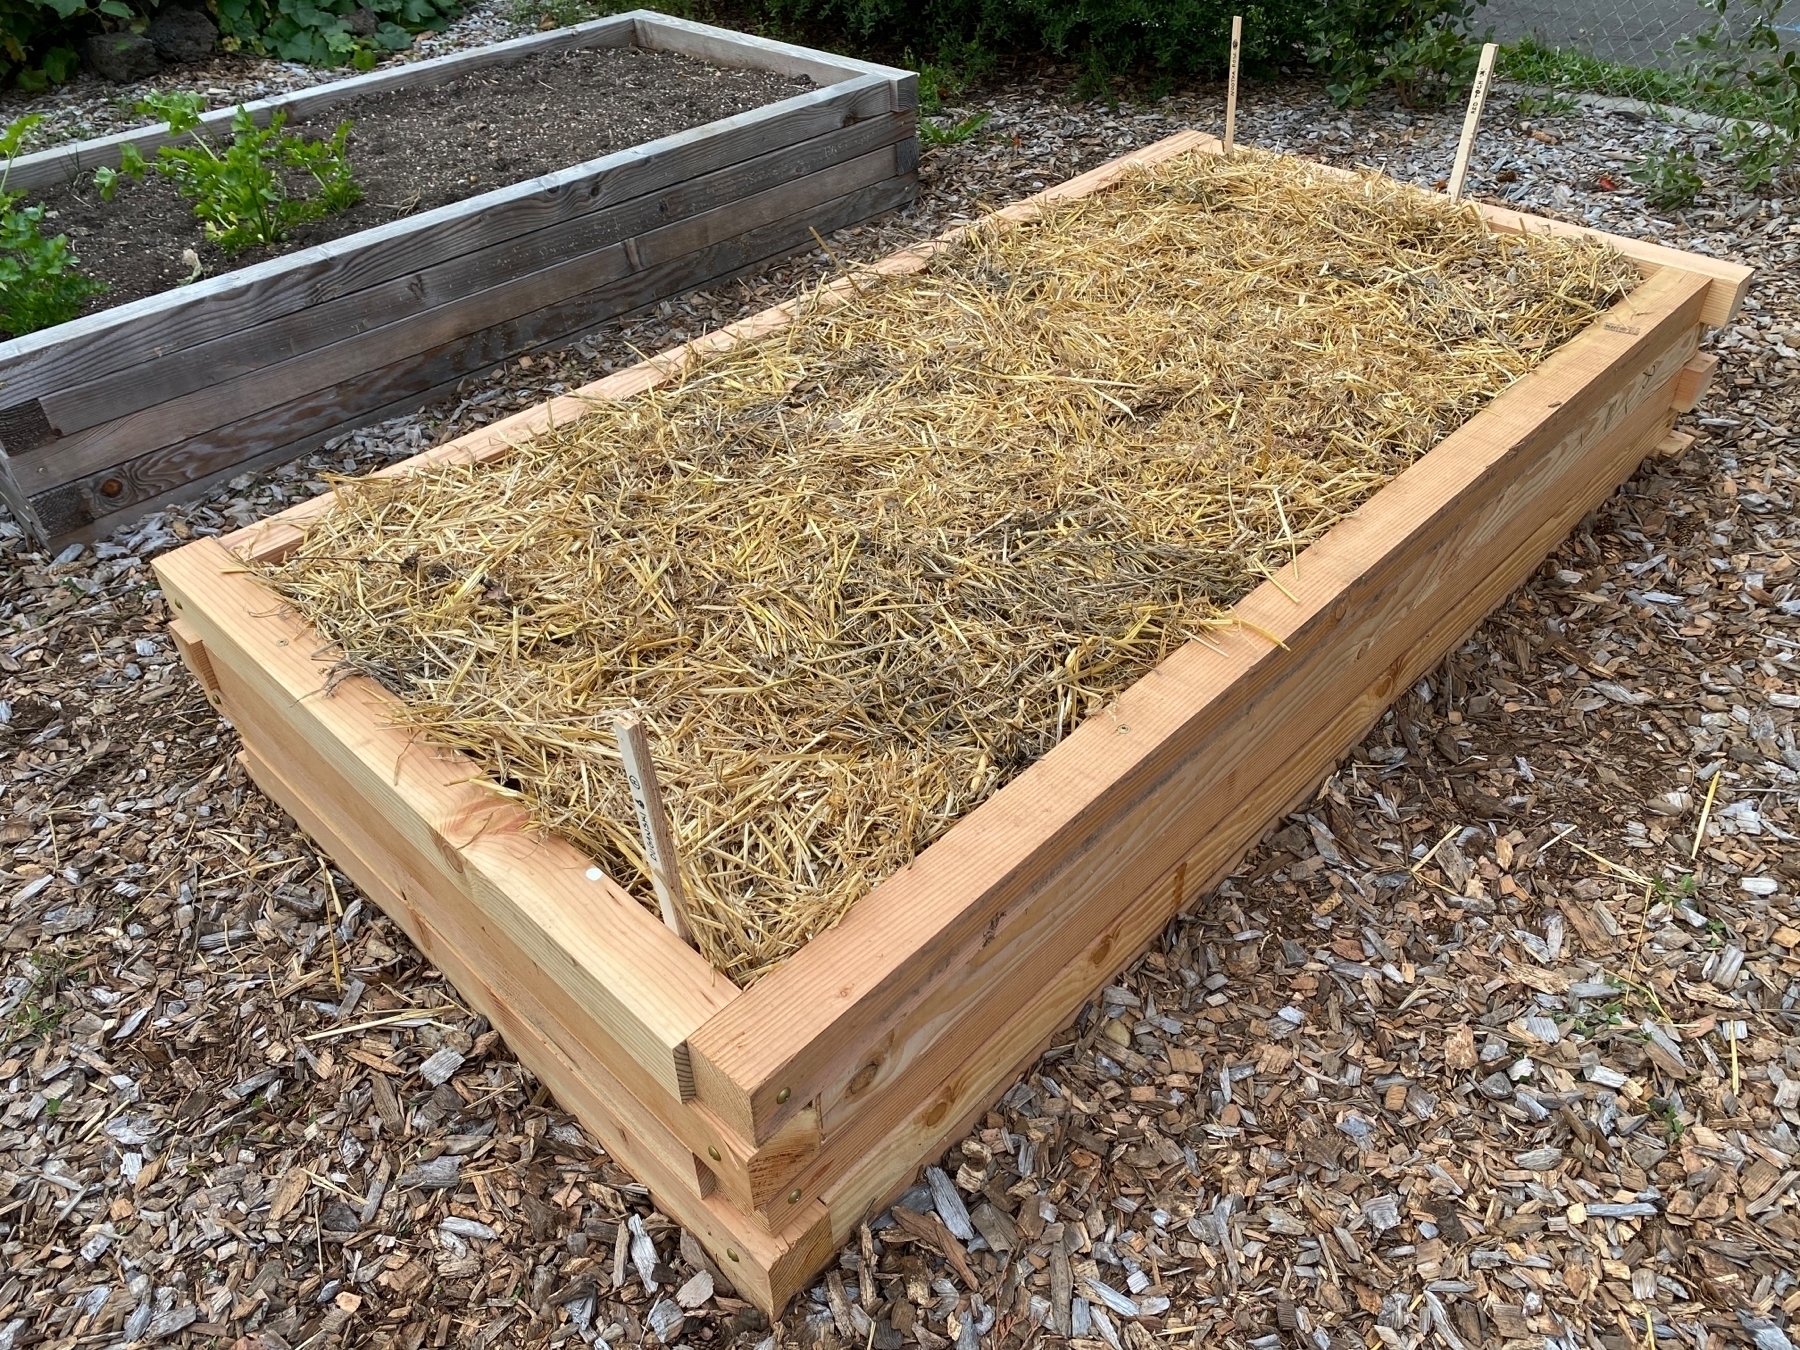
Well, last weekend we built that new gardening bed. It’s the end of the main vegetable growing season but it is also the time to plant garlic. The ones from last year came out great. Apparently you should rotate the bed you use for garlic, so that became the impetus to get the new one set up.
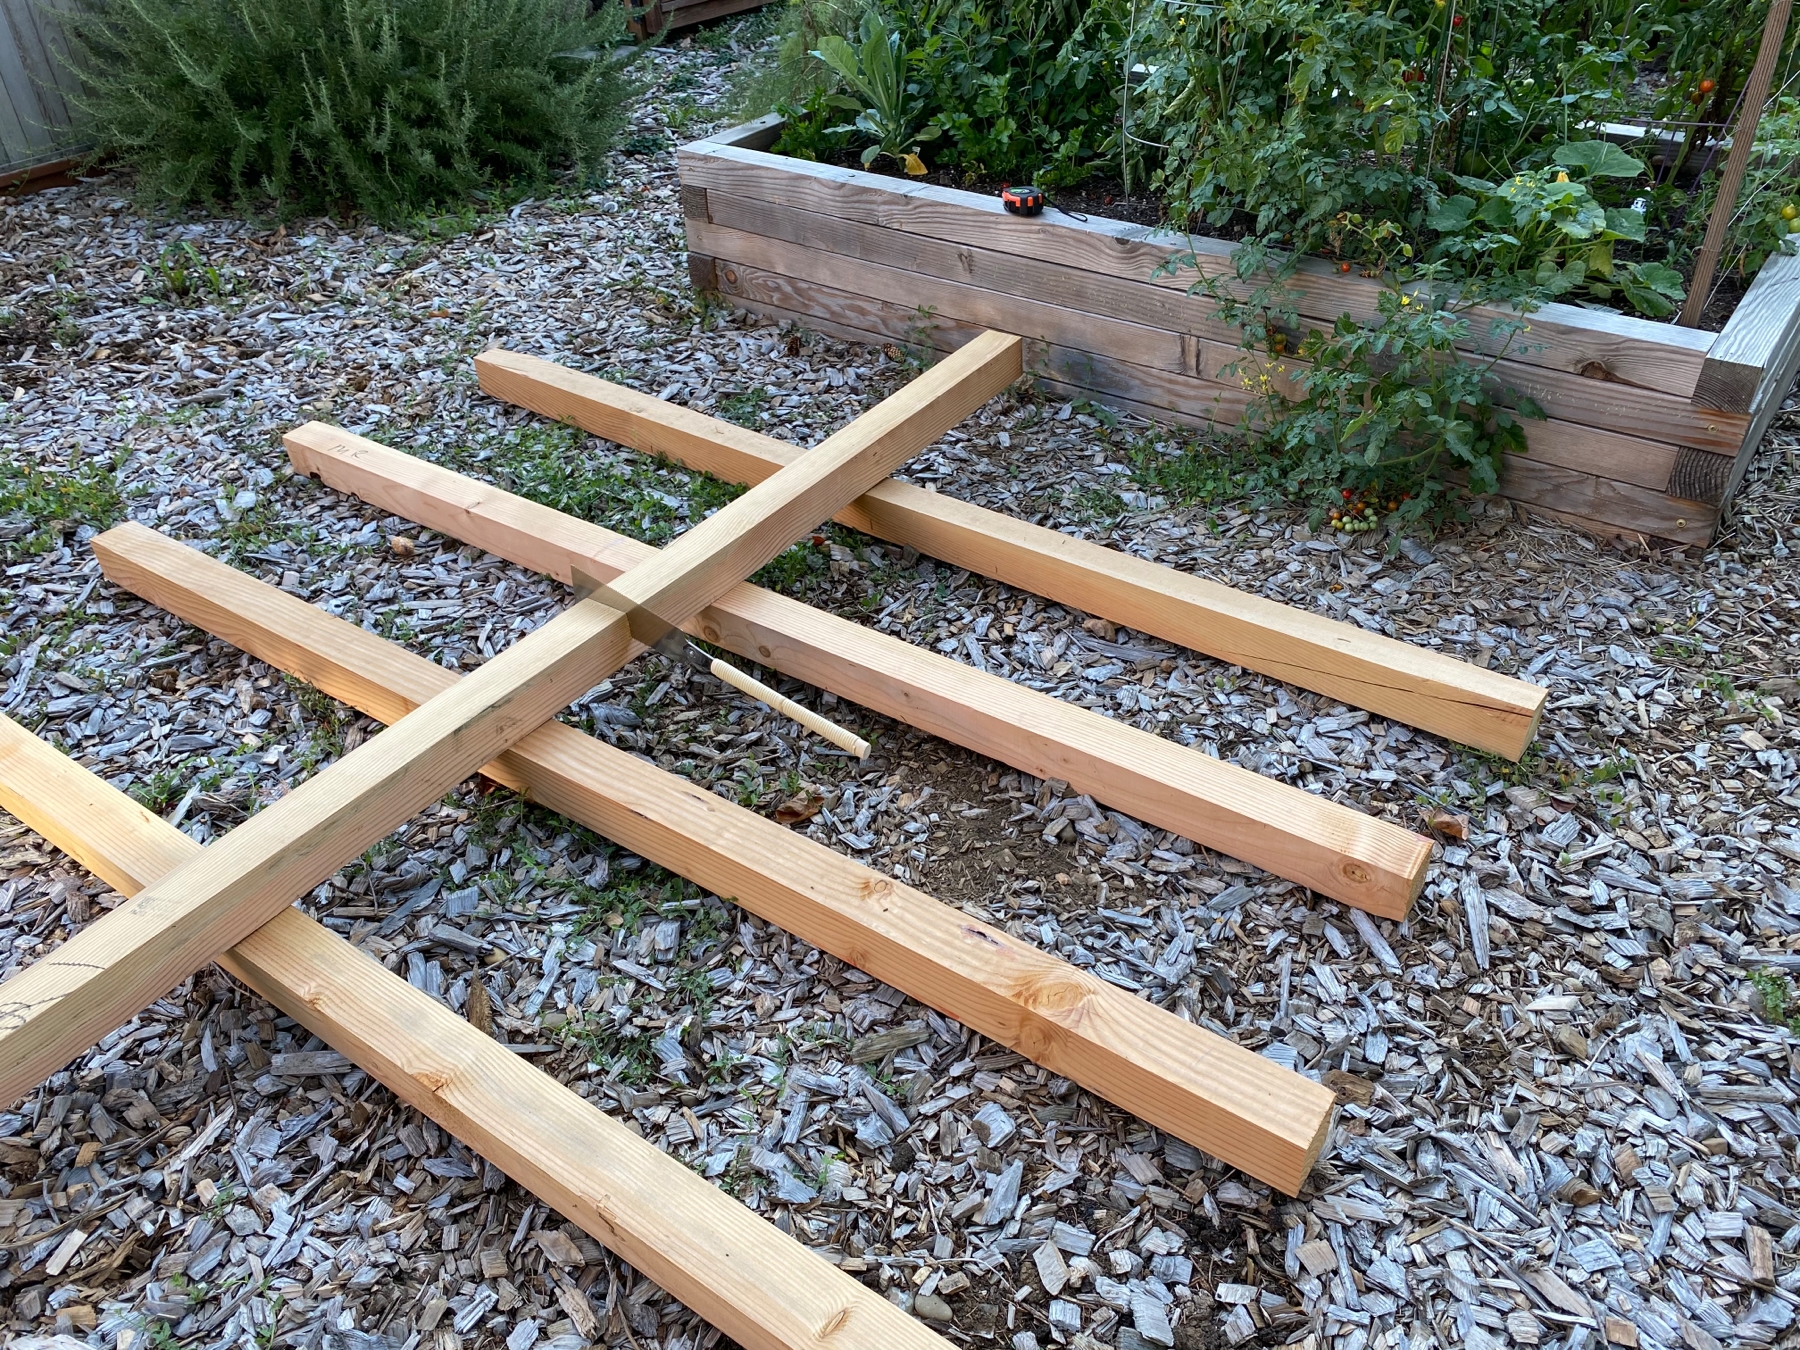
I’d bought some 4x4 lumber almost two months ago for this. Some weeks ago I’d cut ten pieces down to half with my Japanese pull saw. I love that saw. It makes cutting thick lumber pretty much effortless.
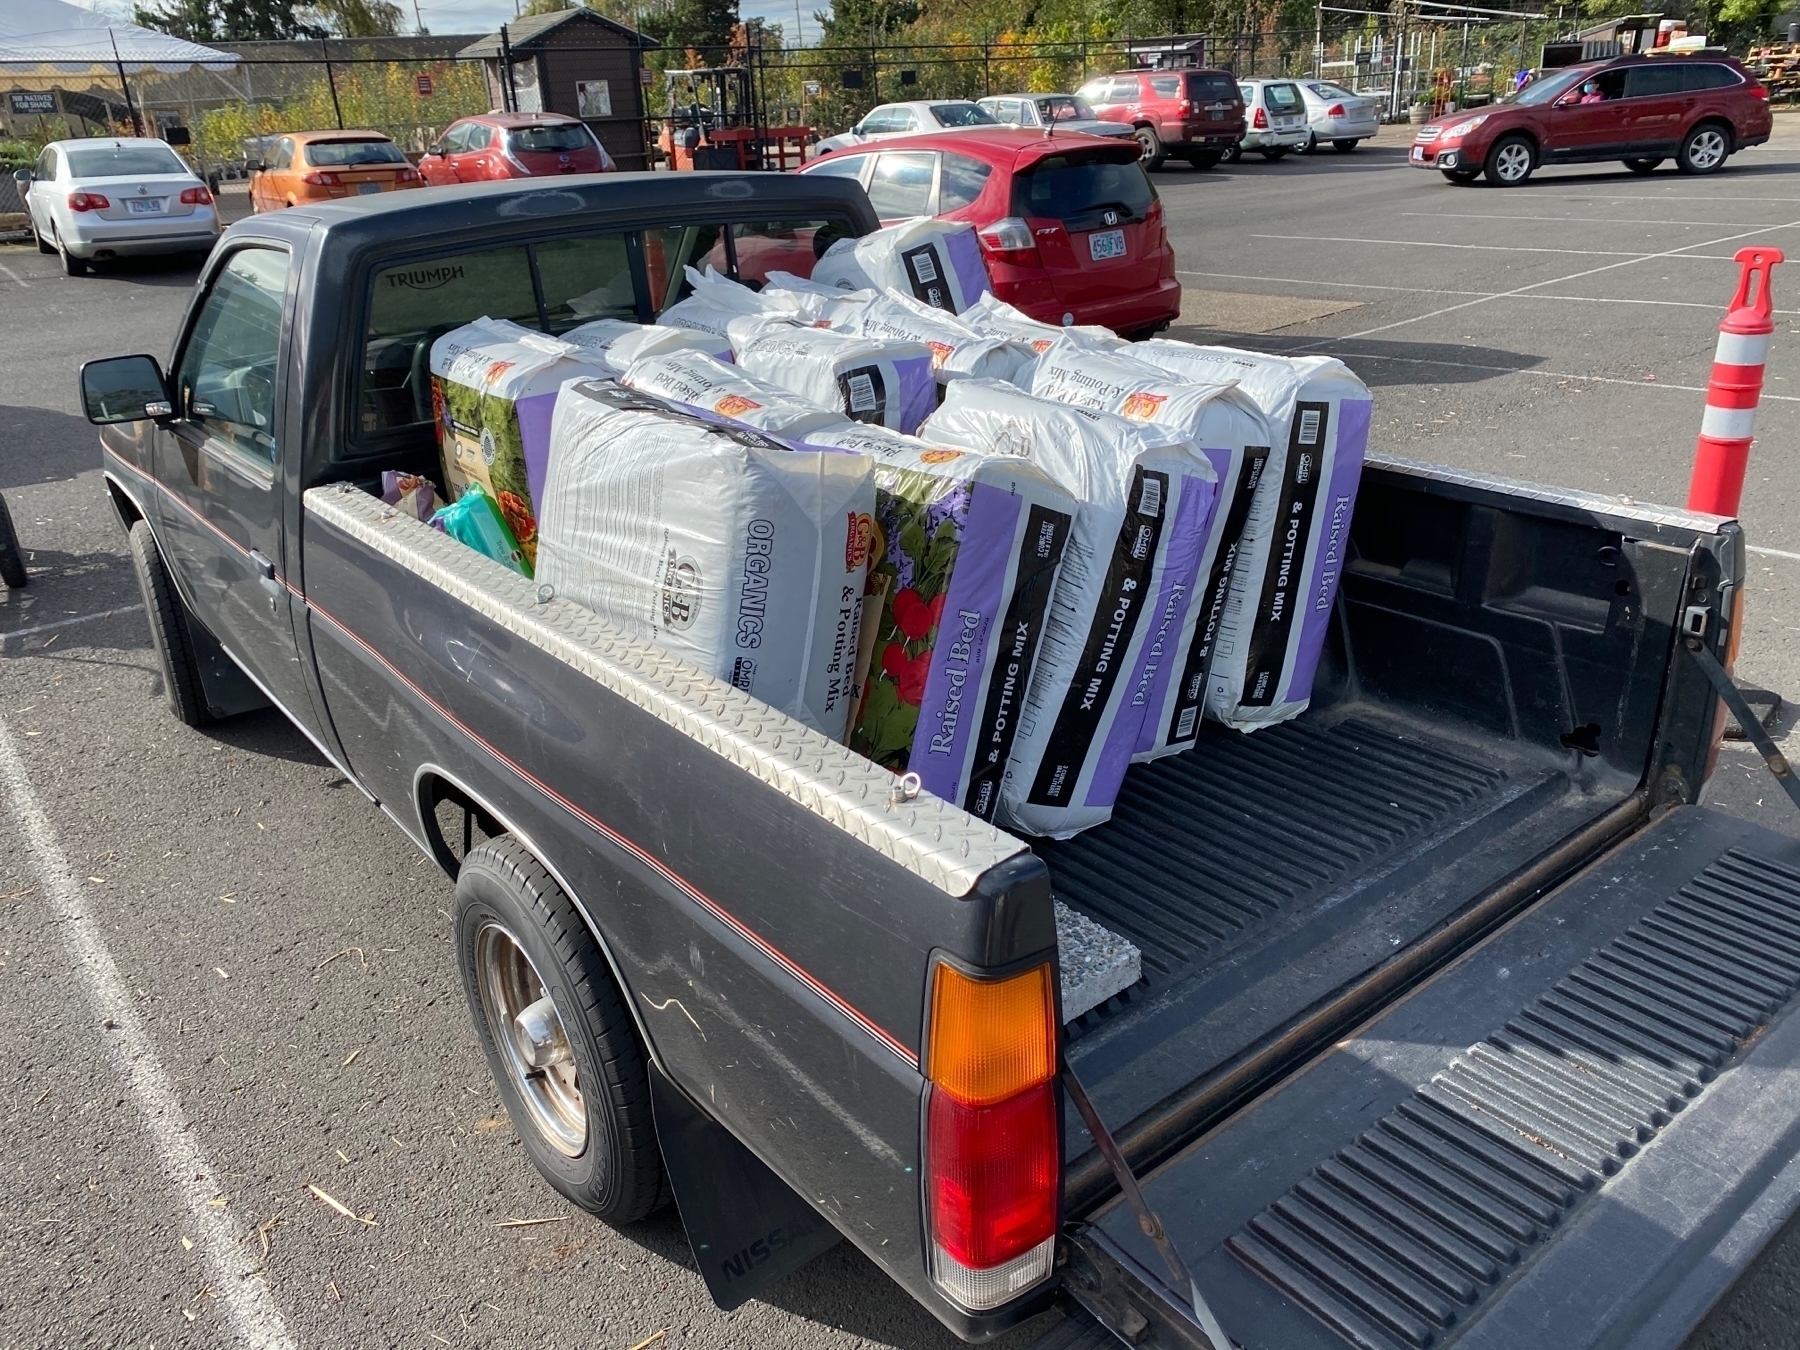
We went to our local gardening store and bought 14 bags of 3 cubic feet of raised bed potting mix. Borrowing a truck from my friend made that easy. Oh and it was fun to drive a stick shift after a long time.
We cleared the space next to the previous bed, leveled it, laid down the fabric and finalized the location.
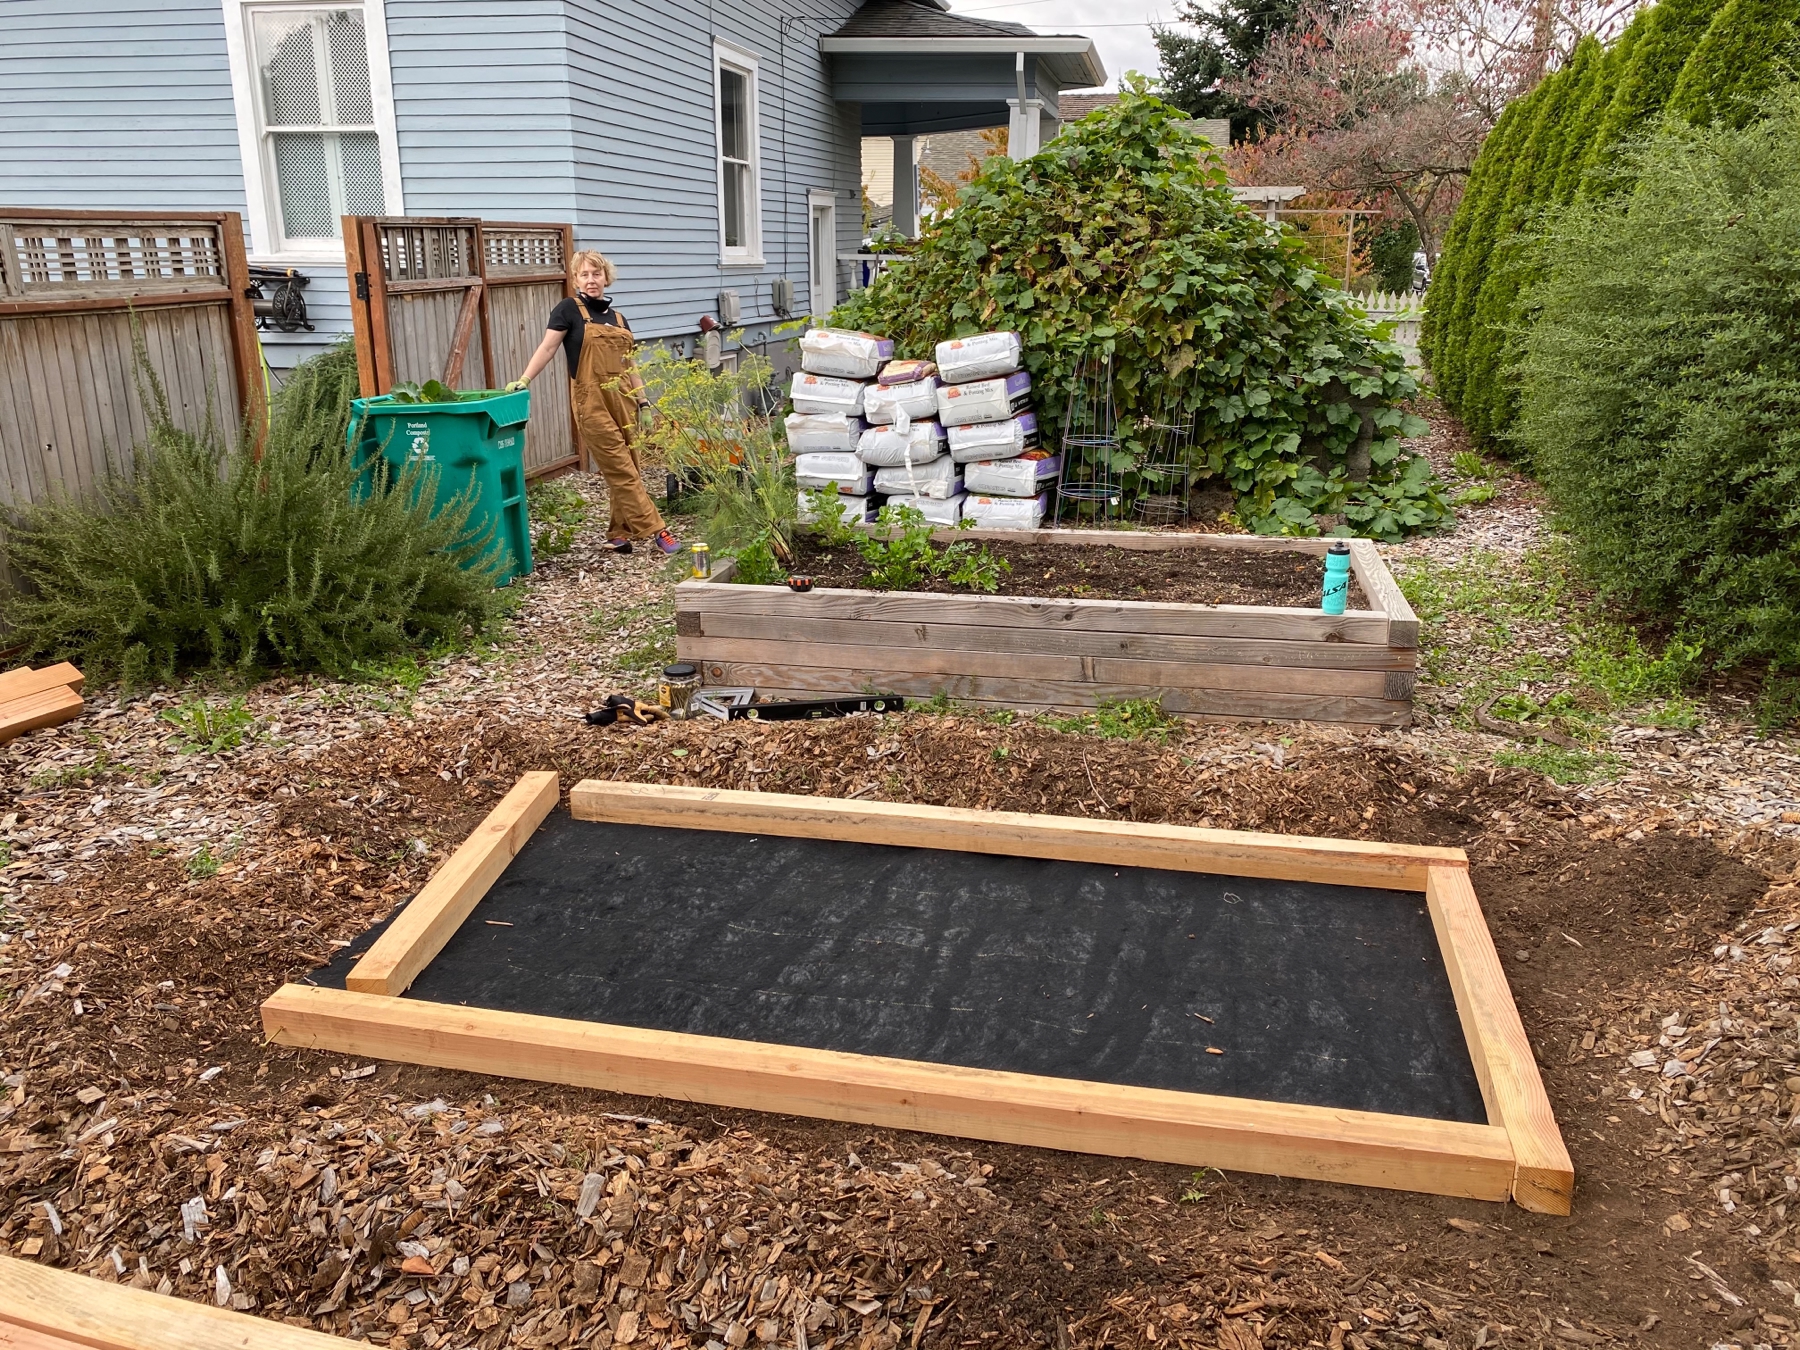
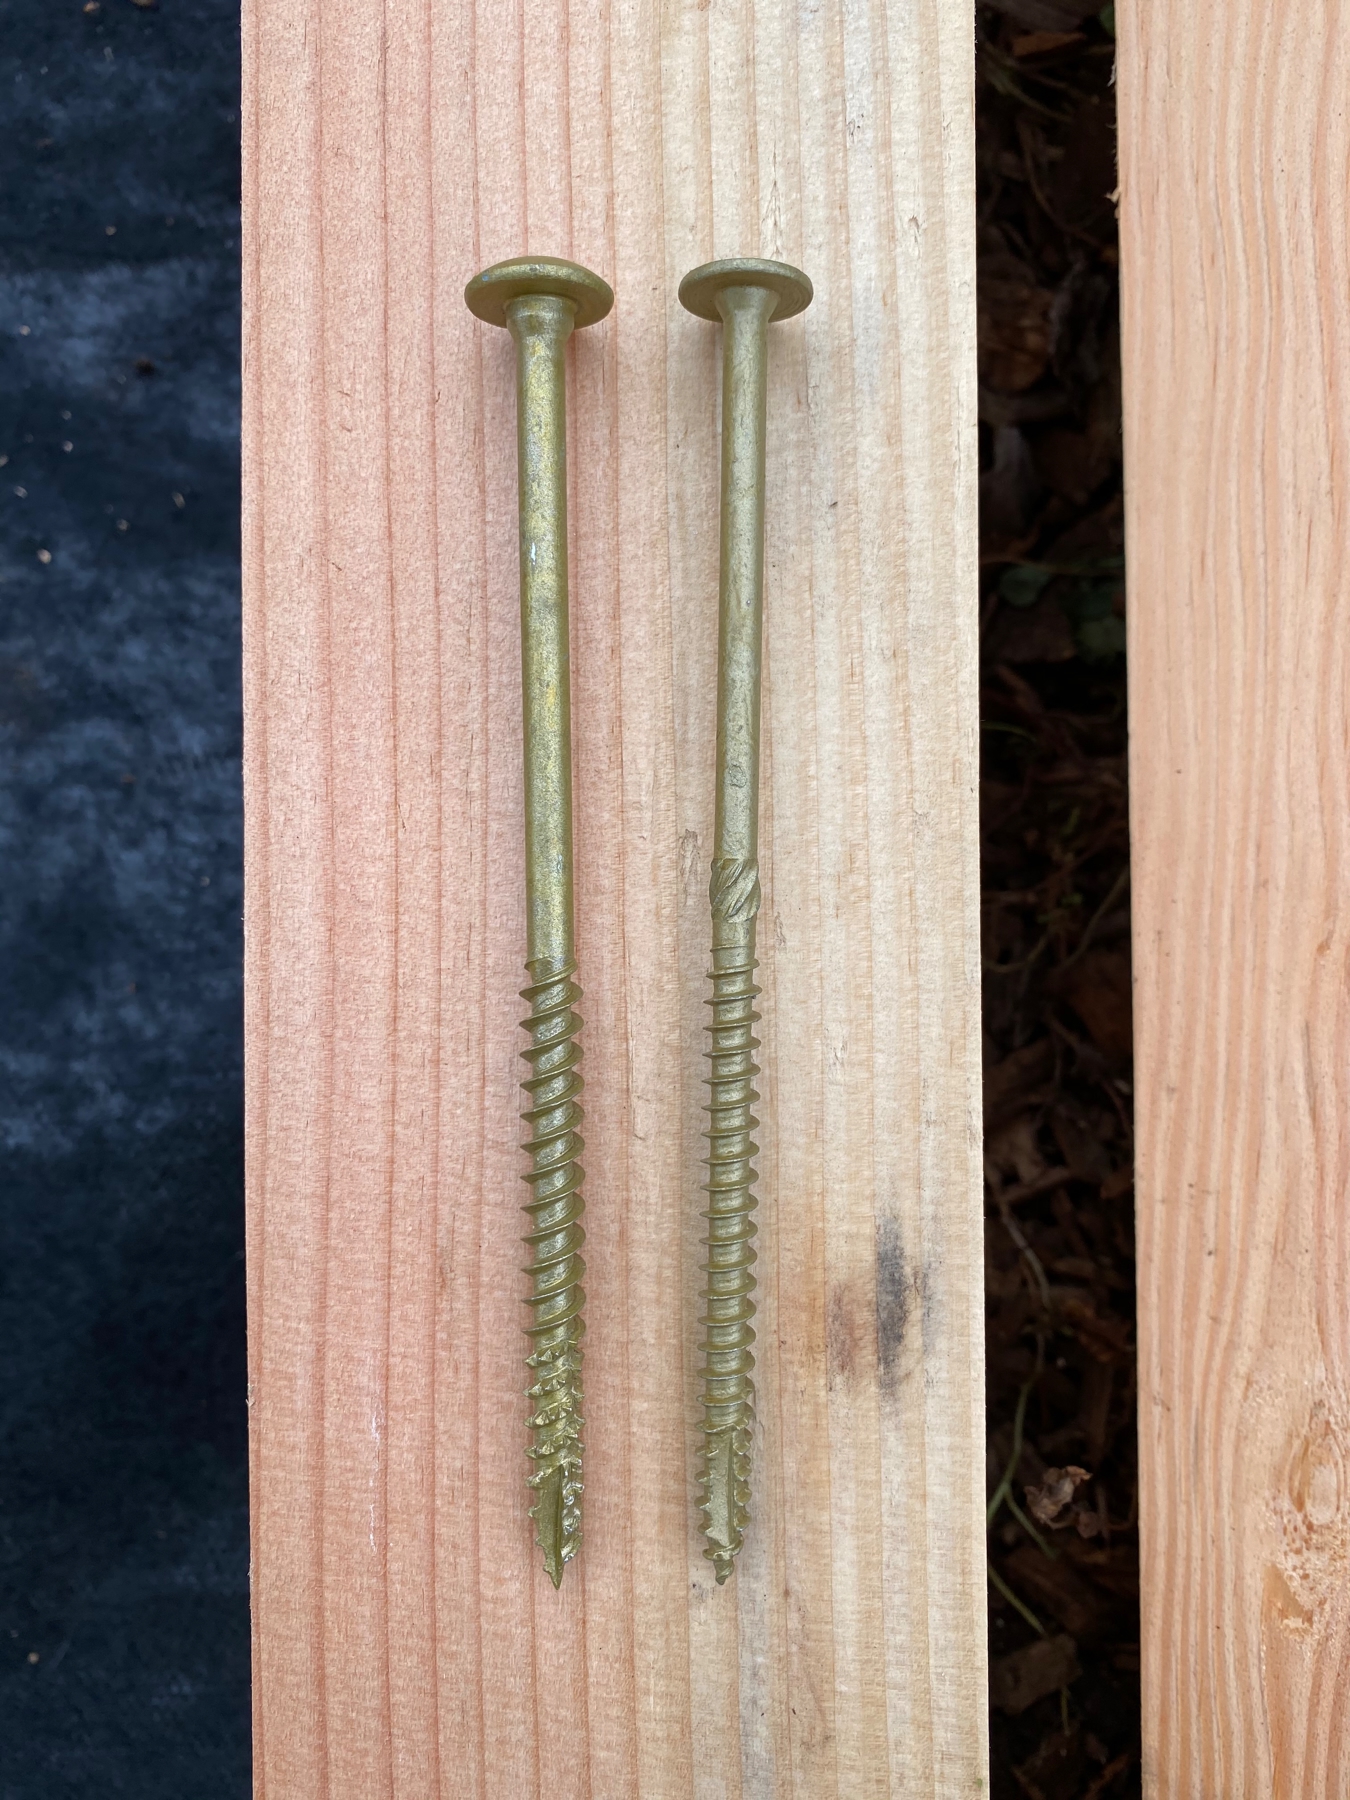
Then came the part of assembling the structure. I had used 6" construction lag screws, with a 5/16" shaft last time. So I went and bought more. The ones I bought this time were a bit different and proved to be a little harder to use. After some trial and error, the final process involved pre-drilling with a long 3/16" bit and screwing in the lag screw after that. Here’s a comparison of the two screws. The one on the left is the new one.
Having resolved that we built up all the layers for the structure.
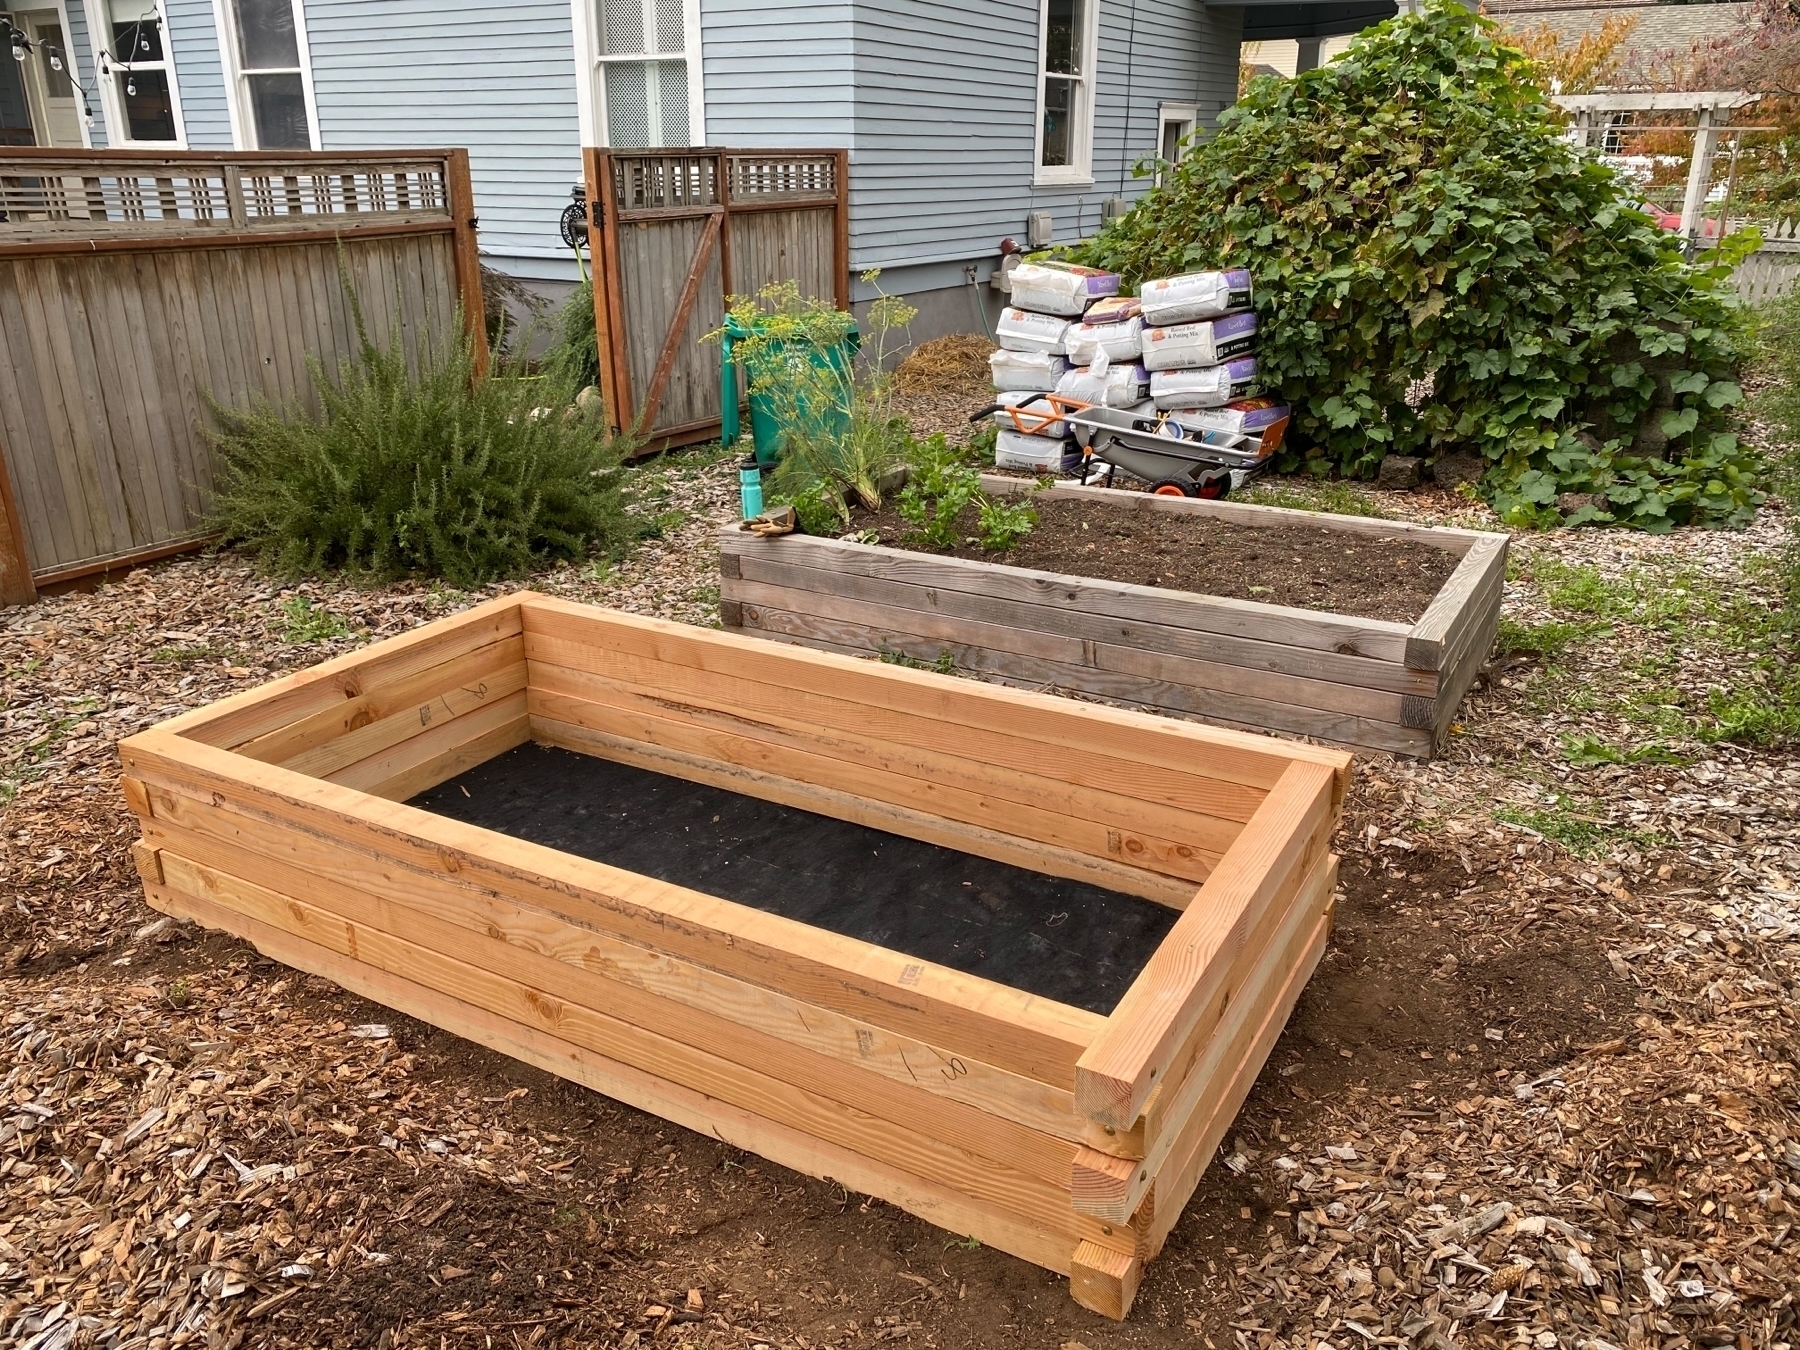
The final step was loading all the dirt which went by a lot faster with bags than it did with shoveling a pile last year.
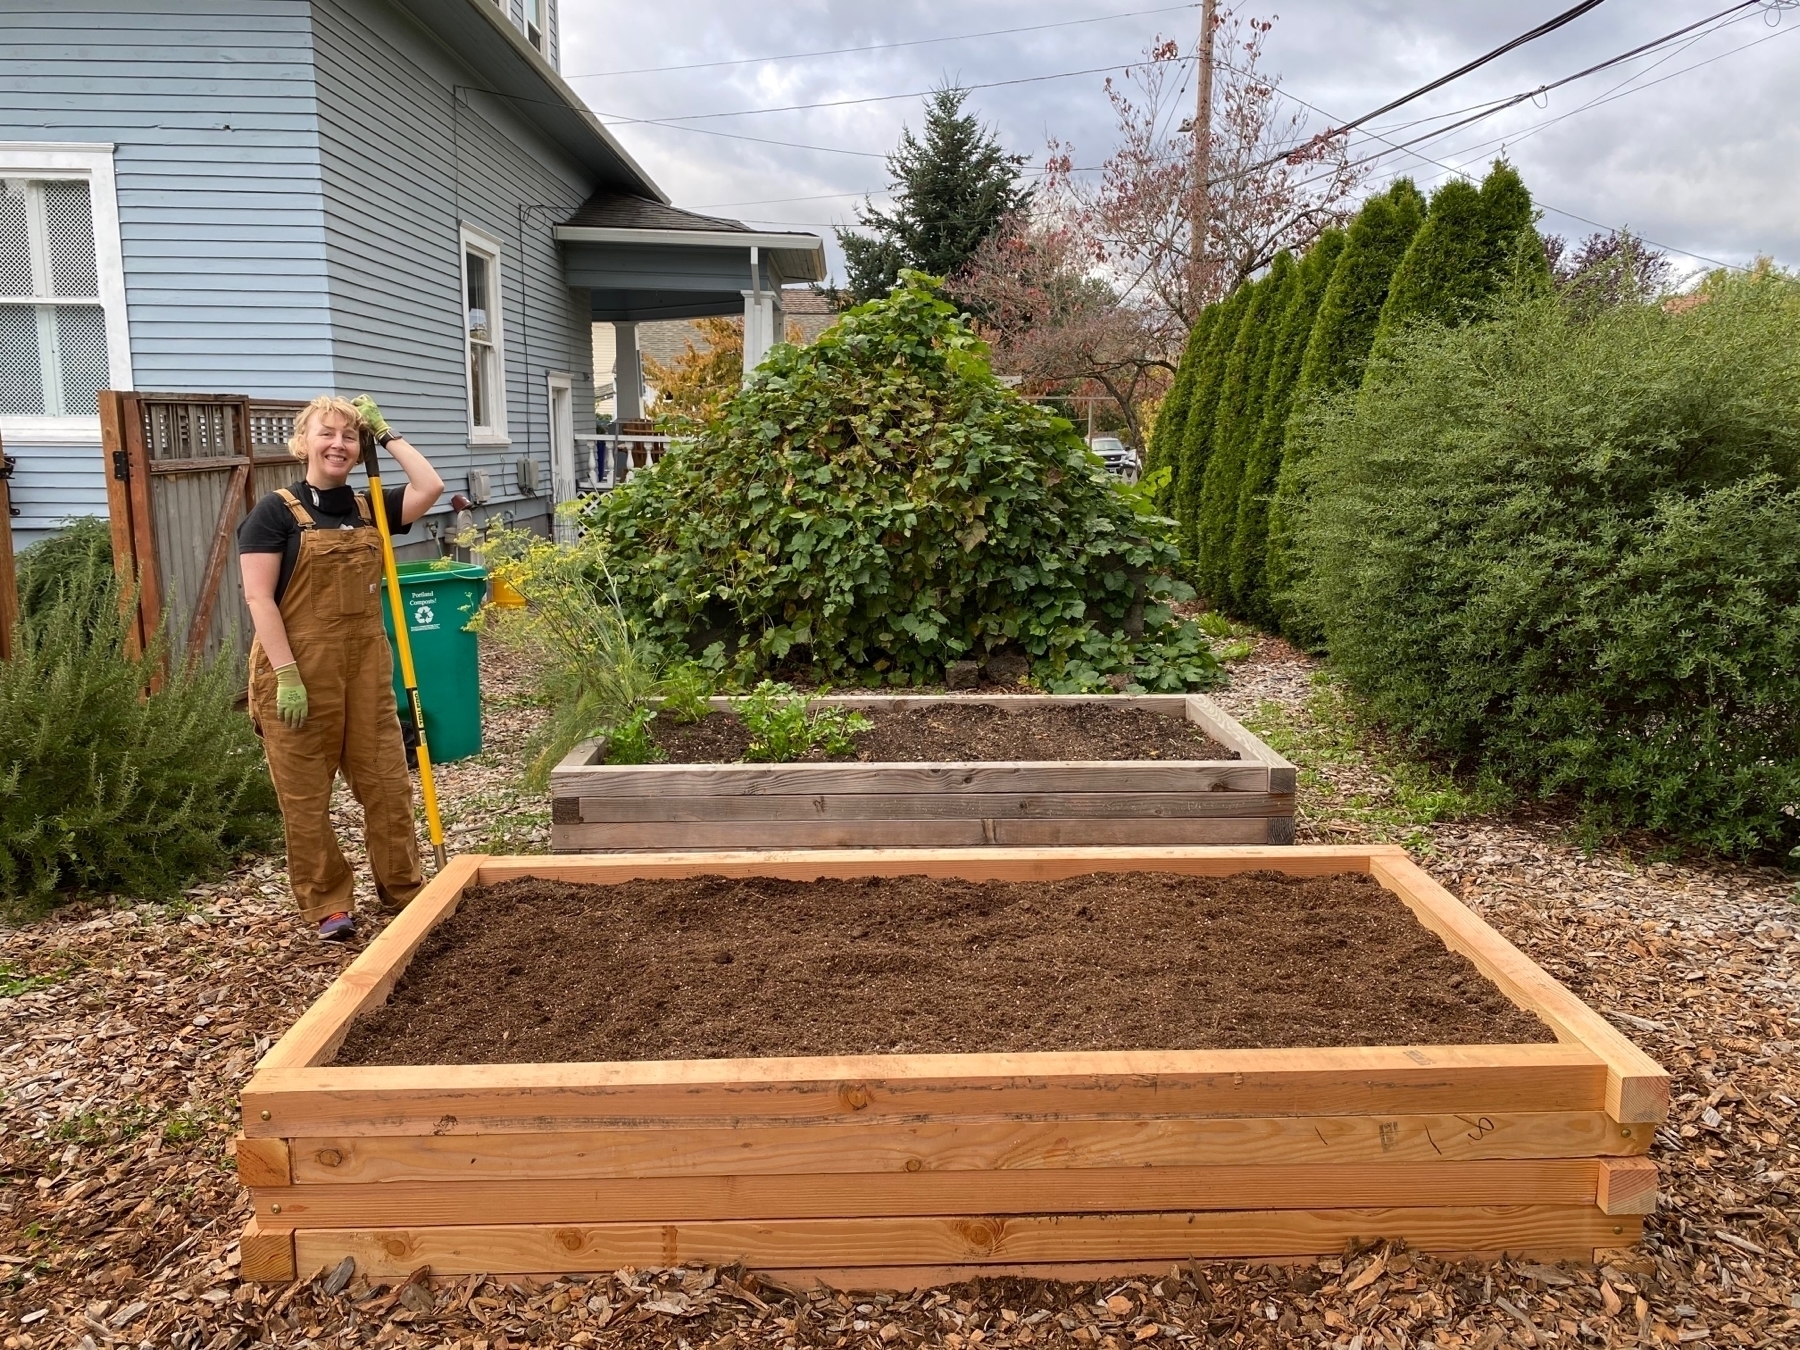
Some slo-mo fun was had too!
A couple of days later Jenni planted all the garlic. So we’re good to go and expecting a bunch in June 2021!
Wiring and Installing a Video Doorbell With Mechanical Chime
I’ve been intrigued by the idea of a video doorbell for some time now. Mostly out of technological curiosity, and sure, a little bit out of a need for convenience. We didn’t even have a doorbell, so people visiting or leaving packages would simply knock on the door which was easy to miss.
At the same time, the prominent products made by large tech companies constantly stream video data from a doorbell to their servers for analysis and trade. That wasn’t something I wanted. So I was on the lookout for a product that would keep the video data local to my home network. It would still send data over the internet to my device if I wanted to access it, or respond to a doorbell ring, but it wouldn’t be sending significant amounts of data that is of no value to me but has value to the surveillance industry.
Thankfully, I have a bit of knowledge on tech stuff, so I can setup and manage a home network. I have wired ethernet cables in my house, and have slowly upgraded my network to use more advanced networking equipment made by Ubiquiti, rather than the stock WiFi enabled router provided by my ISP. It was with this in mind that I learned the Ubiquiti had recently launched a video doorbell in their UniFi line, which is what I use for my home networking equipment. Once I got a chance to place an order, I did, and sure enough the doorbell arrived a few days later. That was the easy part.
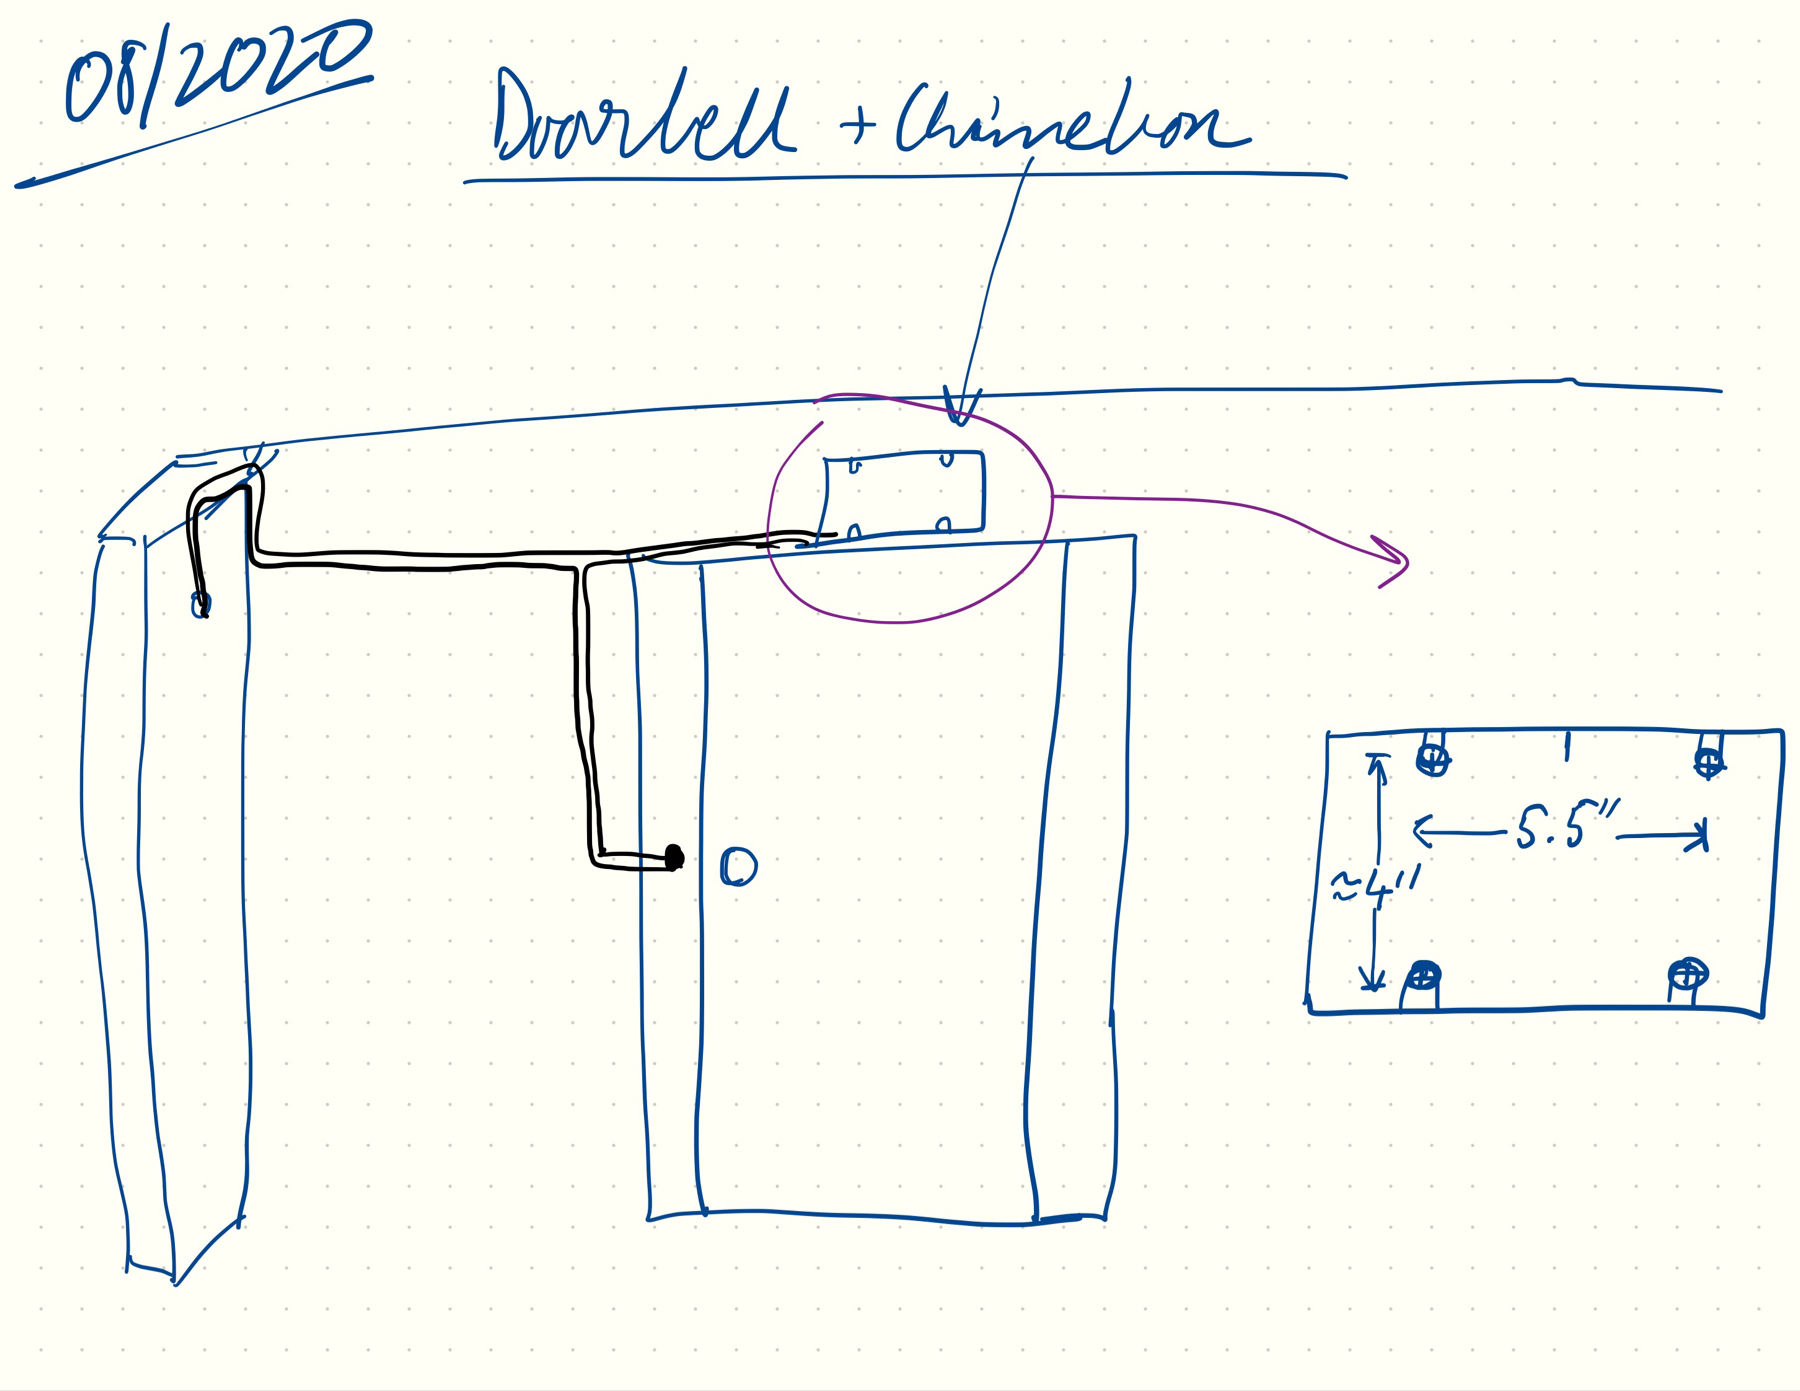
Now, as I mentioned, we didn’t have a doorbell, so we didn’t even have wiring for it. I did some research, and figured out how I wanted to wire it. It’s a low voltage circuit that requires a step-down AC transformer. Normally that is attached to the wiring directly at a box in an inaccessible area, but I found a solution where I could access a wall outlet and so wouldn’t need to drill into a wall or floor. A friend had a plug-in transformer that he wasn’t using, so all I needed was some wire, which I ordered. I also ordered a mechanical chime that would ring when the doorbell was pressed. I drew this rough sketch of how I imagined it getting wired.
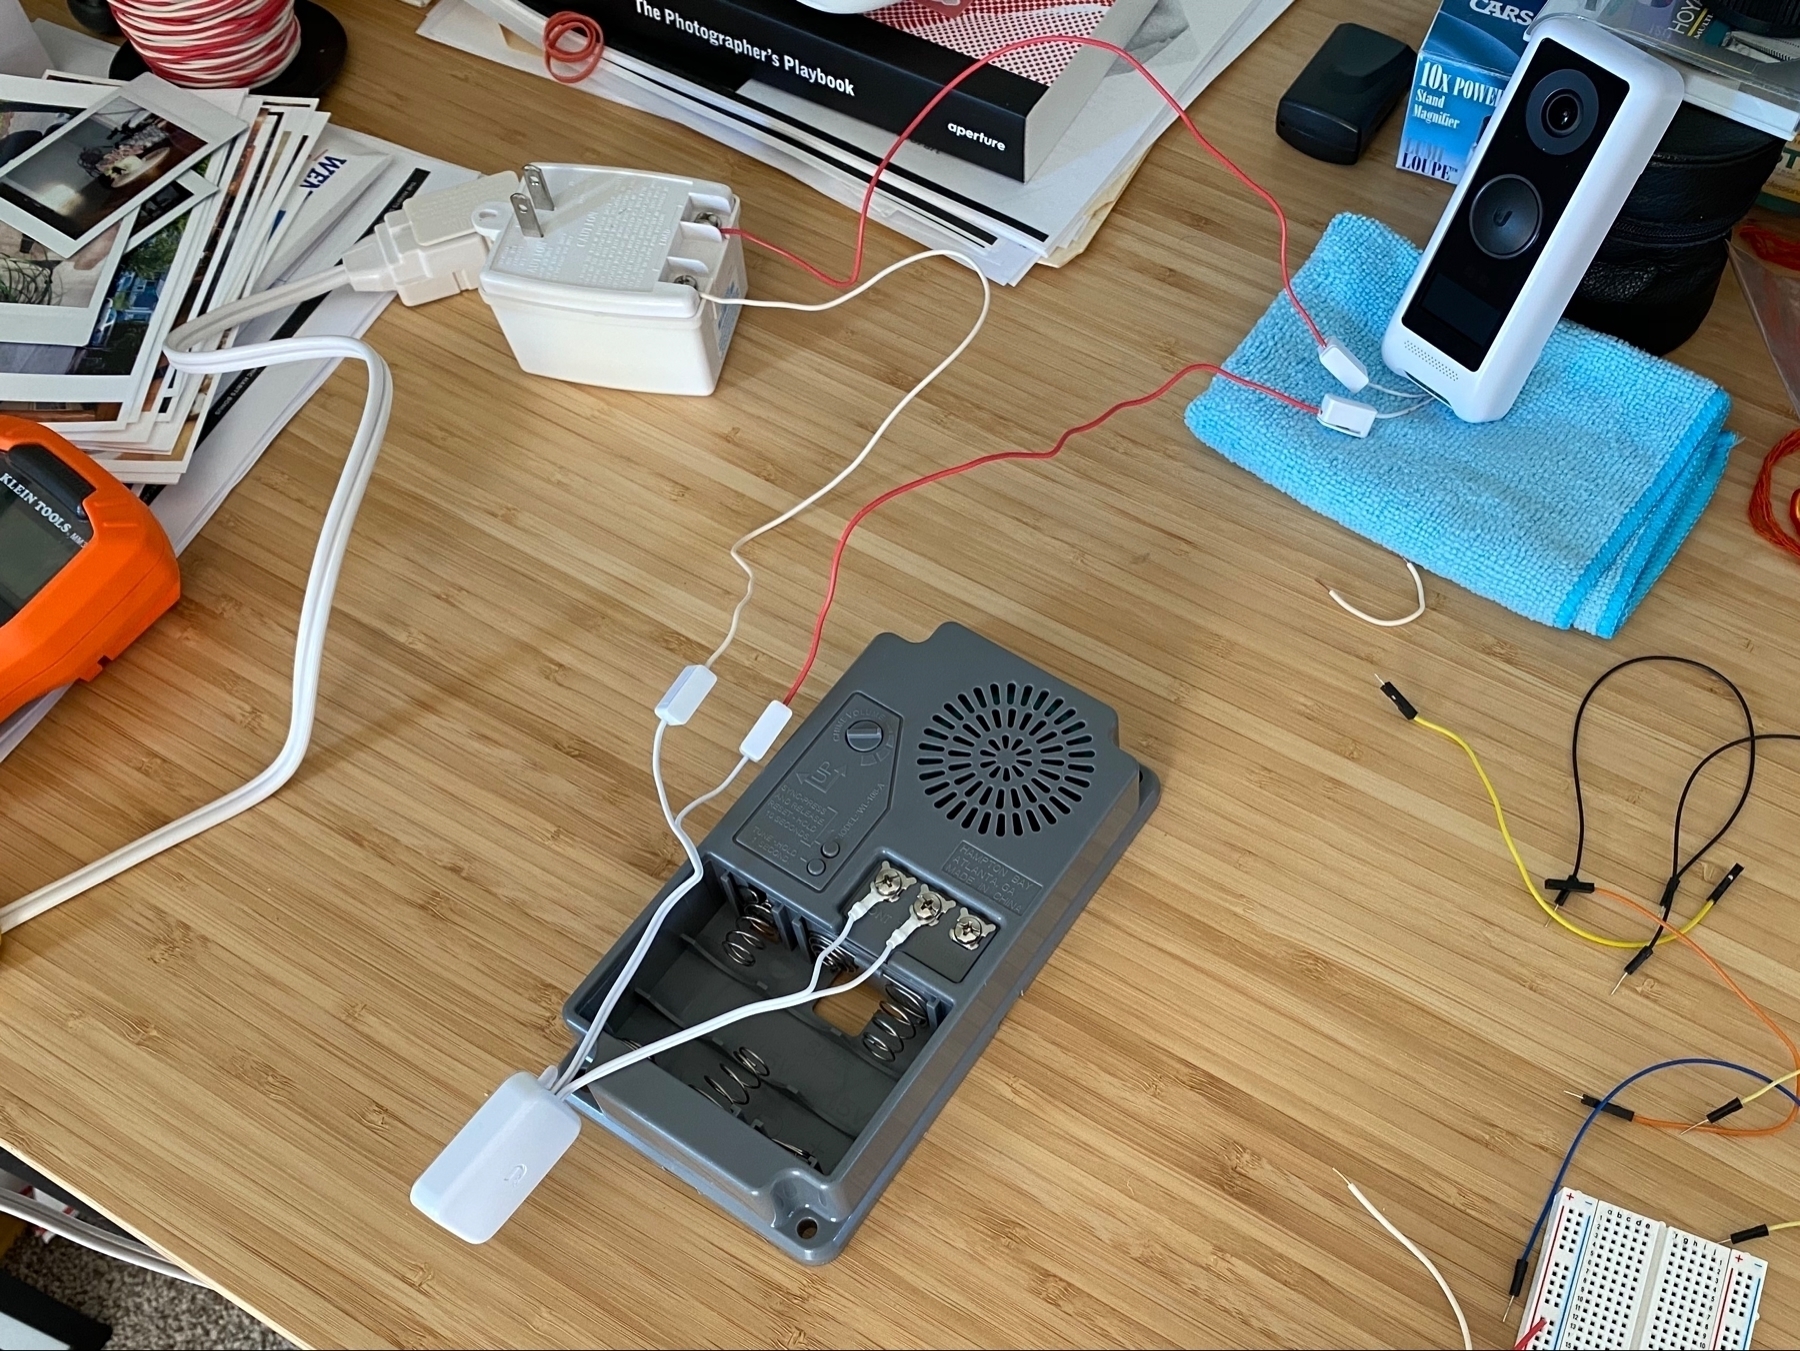
At this point I set up a circuit on my desk and wired everything up. First it was just the doorbell which was easy to start and setup. Then I wired in the chime and tested that everything worked fine, which it did 🎉
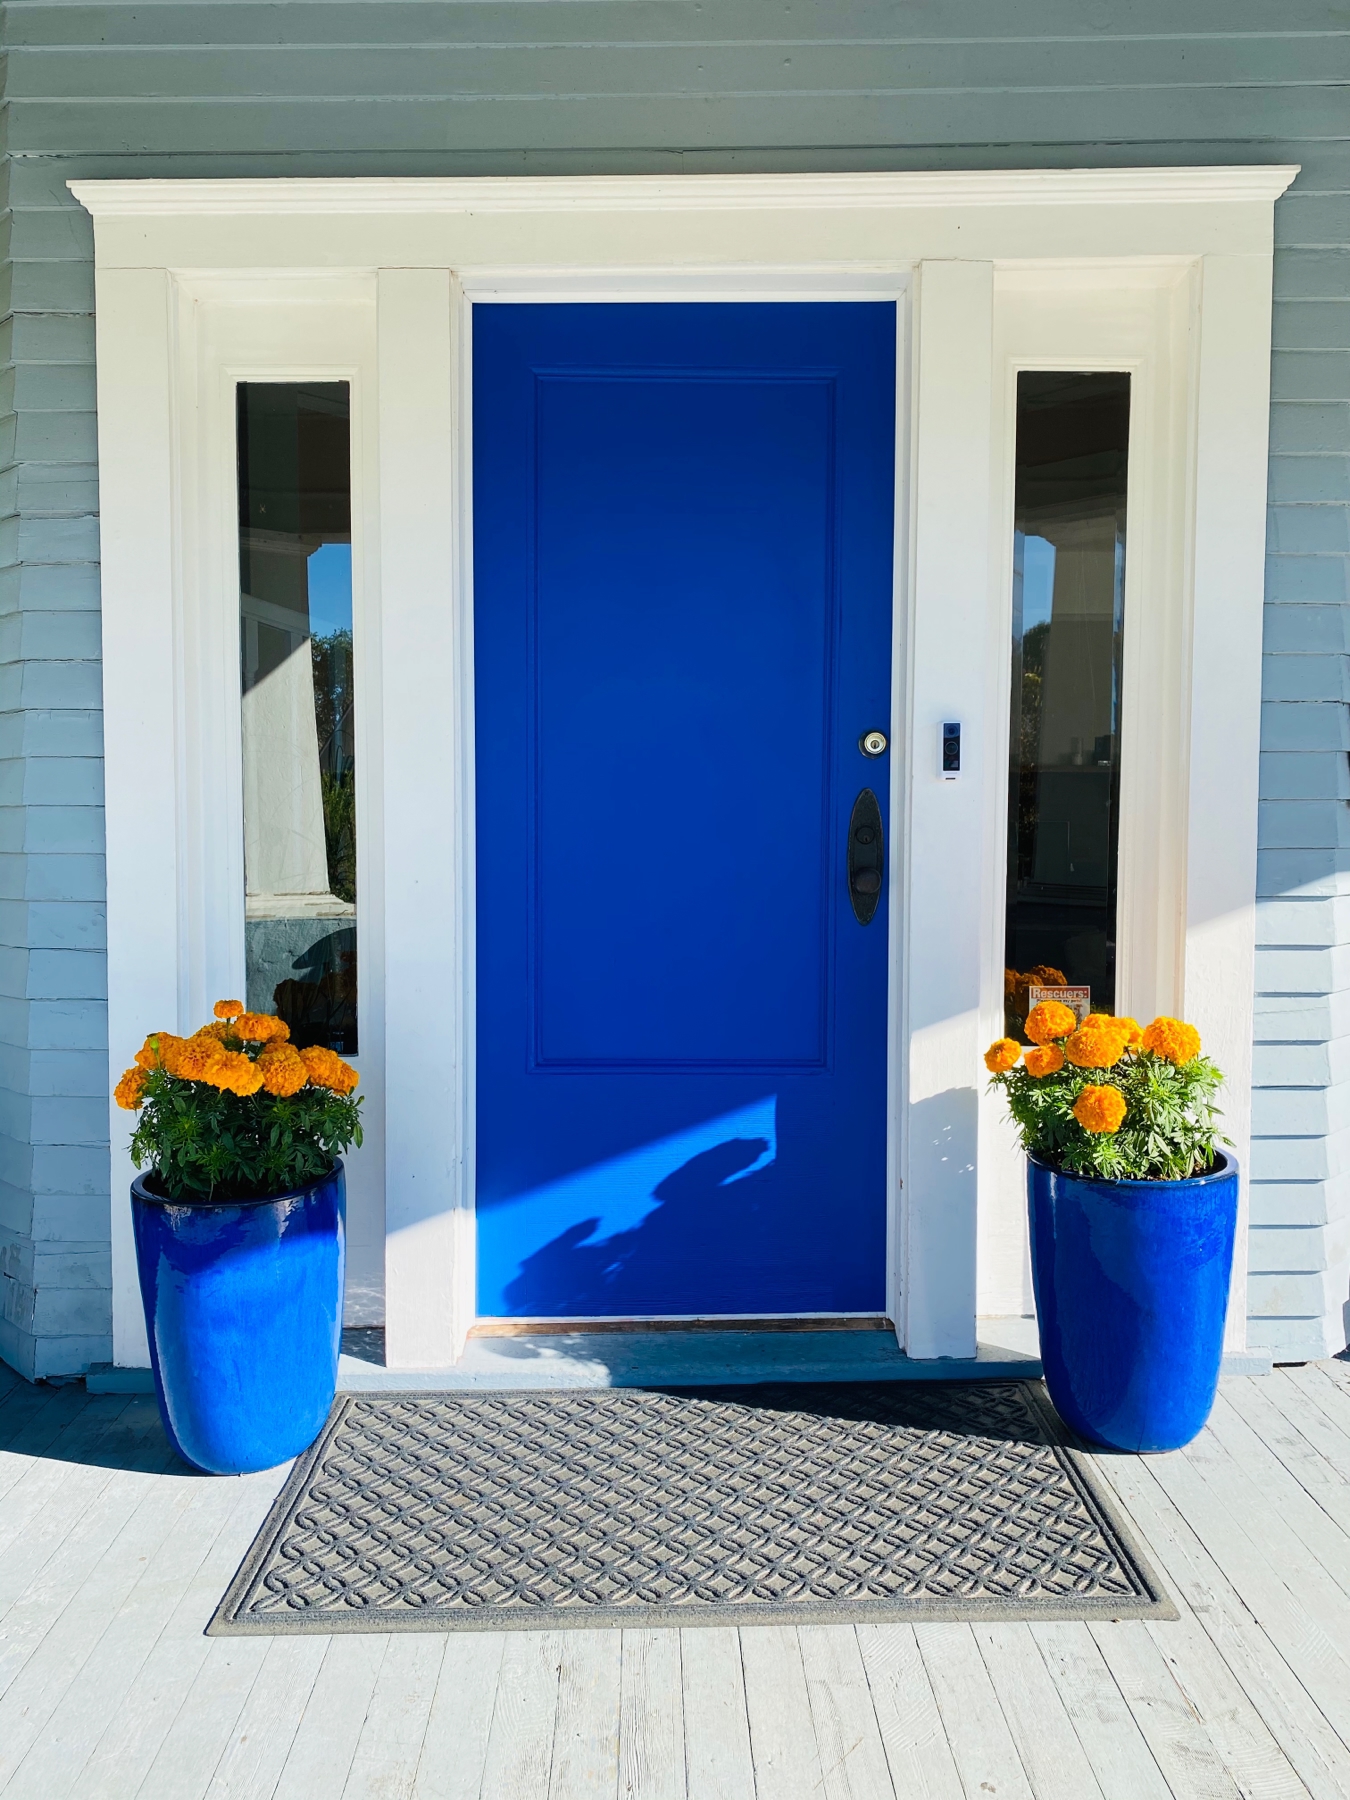
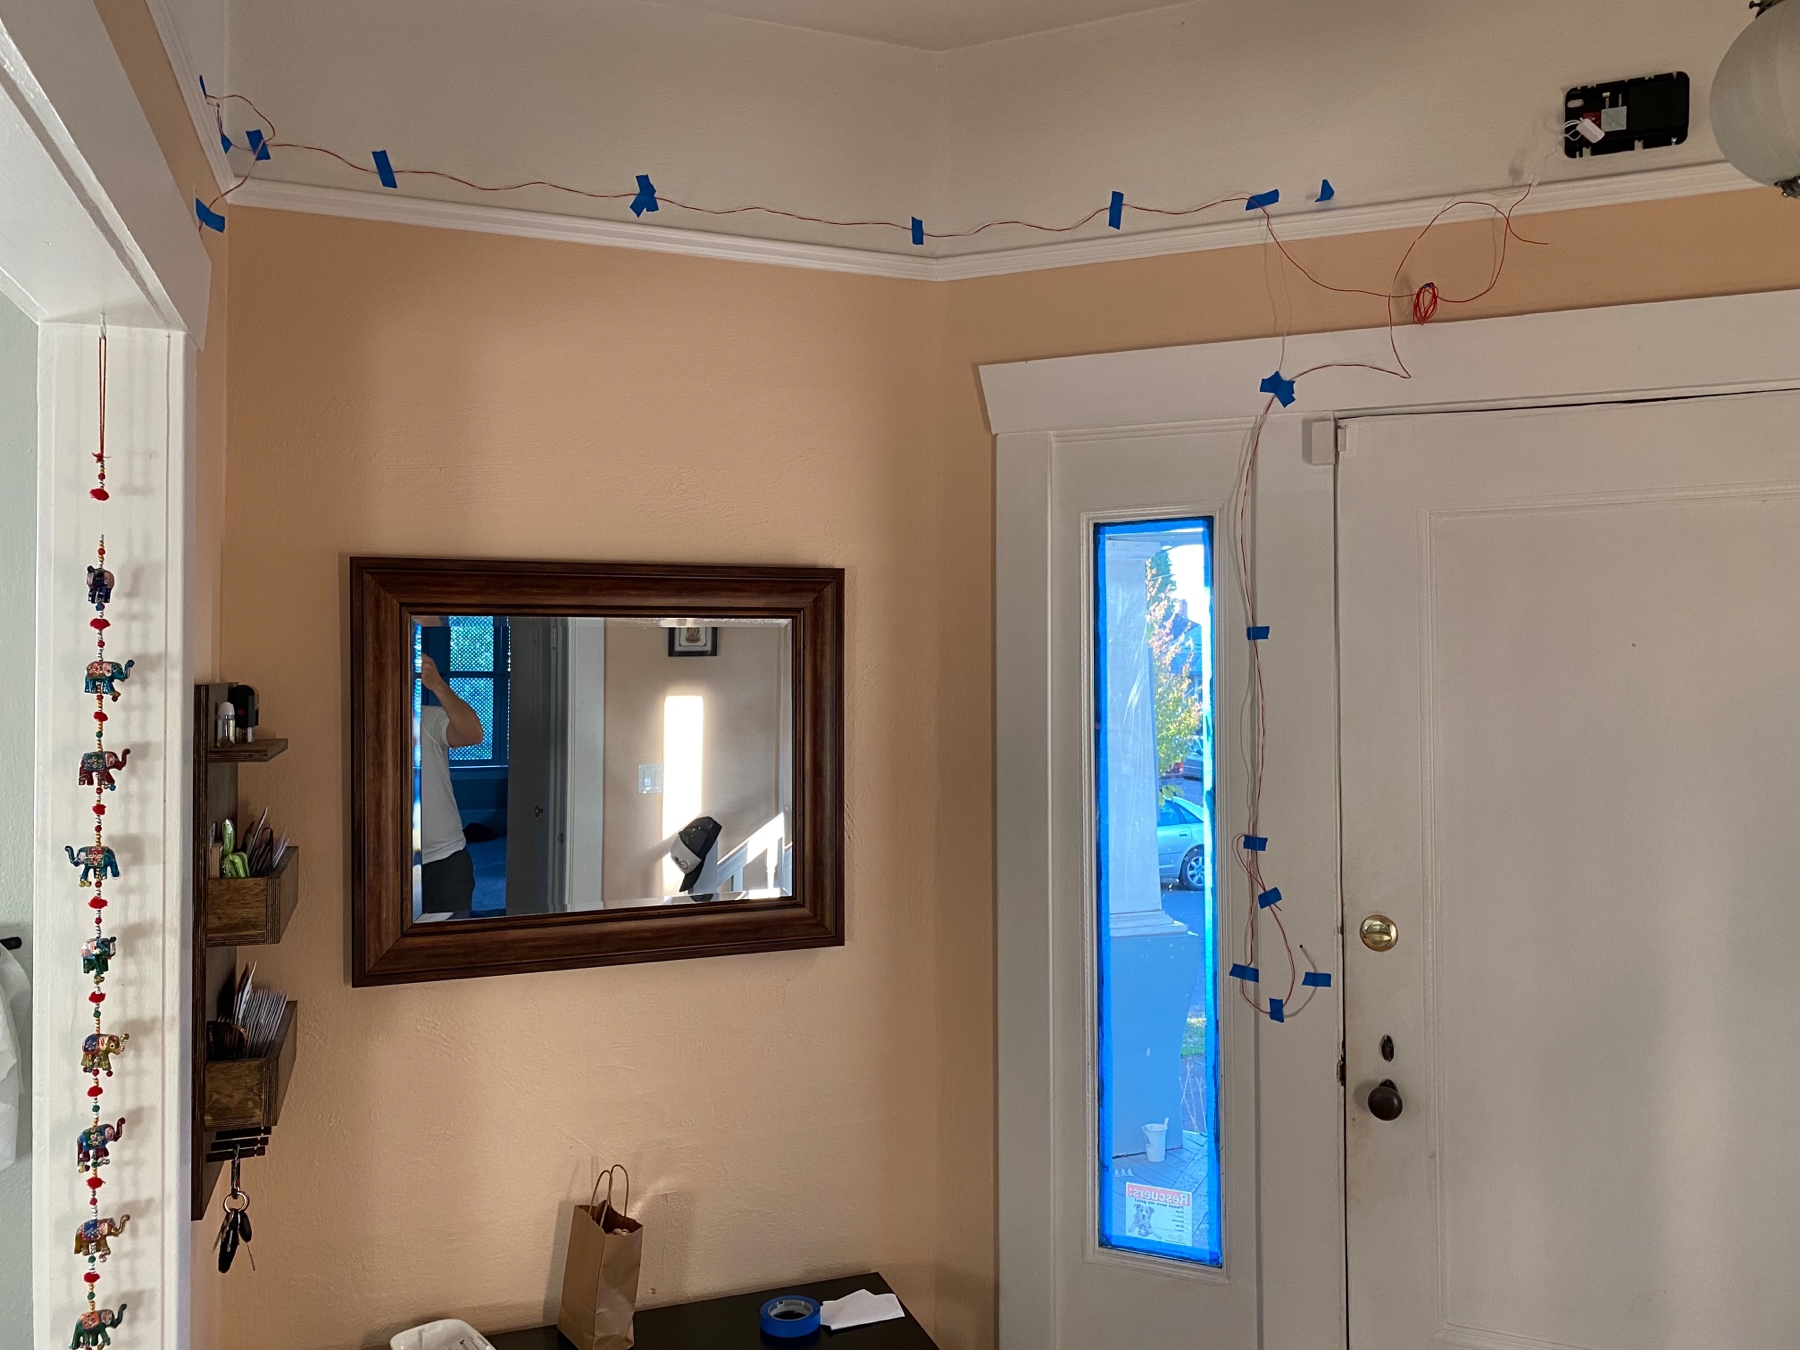
I was able to use an existing wire path for part of the way from the outlet to the door, so I got going by pulling wire through that. I drilled a hole next to the door, ran the wire through and installed the doorbell. Once again I tested that it was working fine. Next I installed the chime on the wall above the door on the inside and connected it to the circuit. And that was it for the wiring. Everything worked well. The doorbell had a good signal. This is what it looked like.
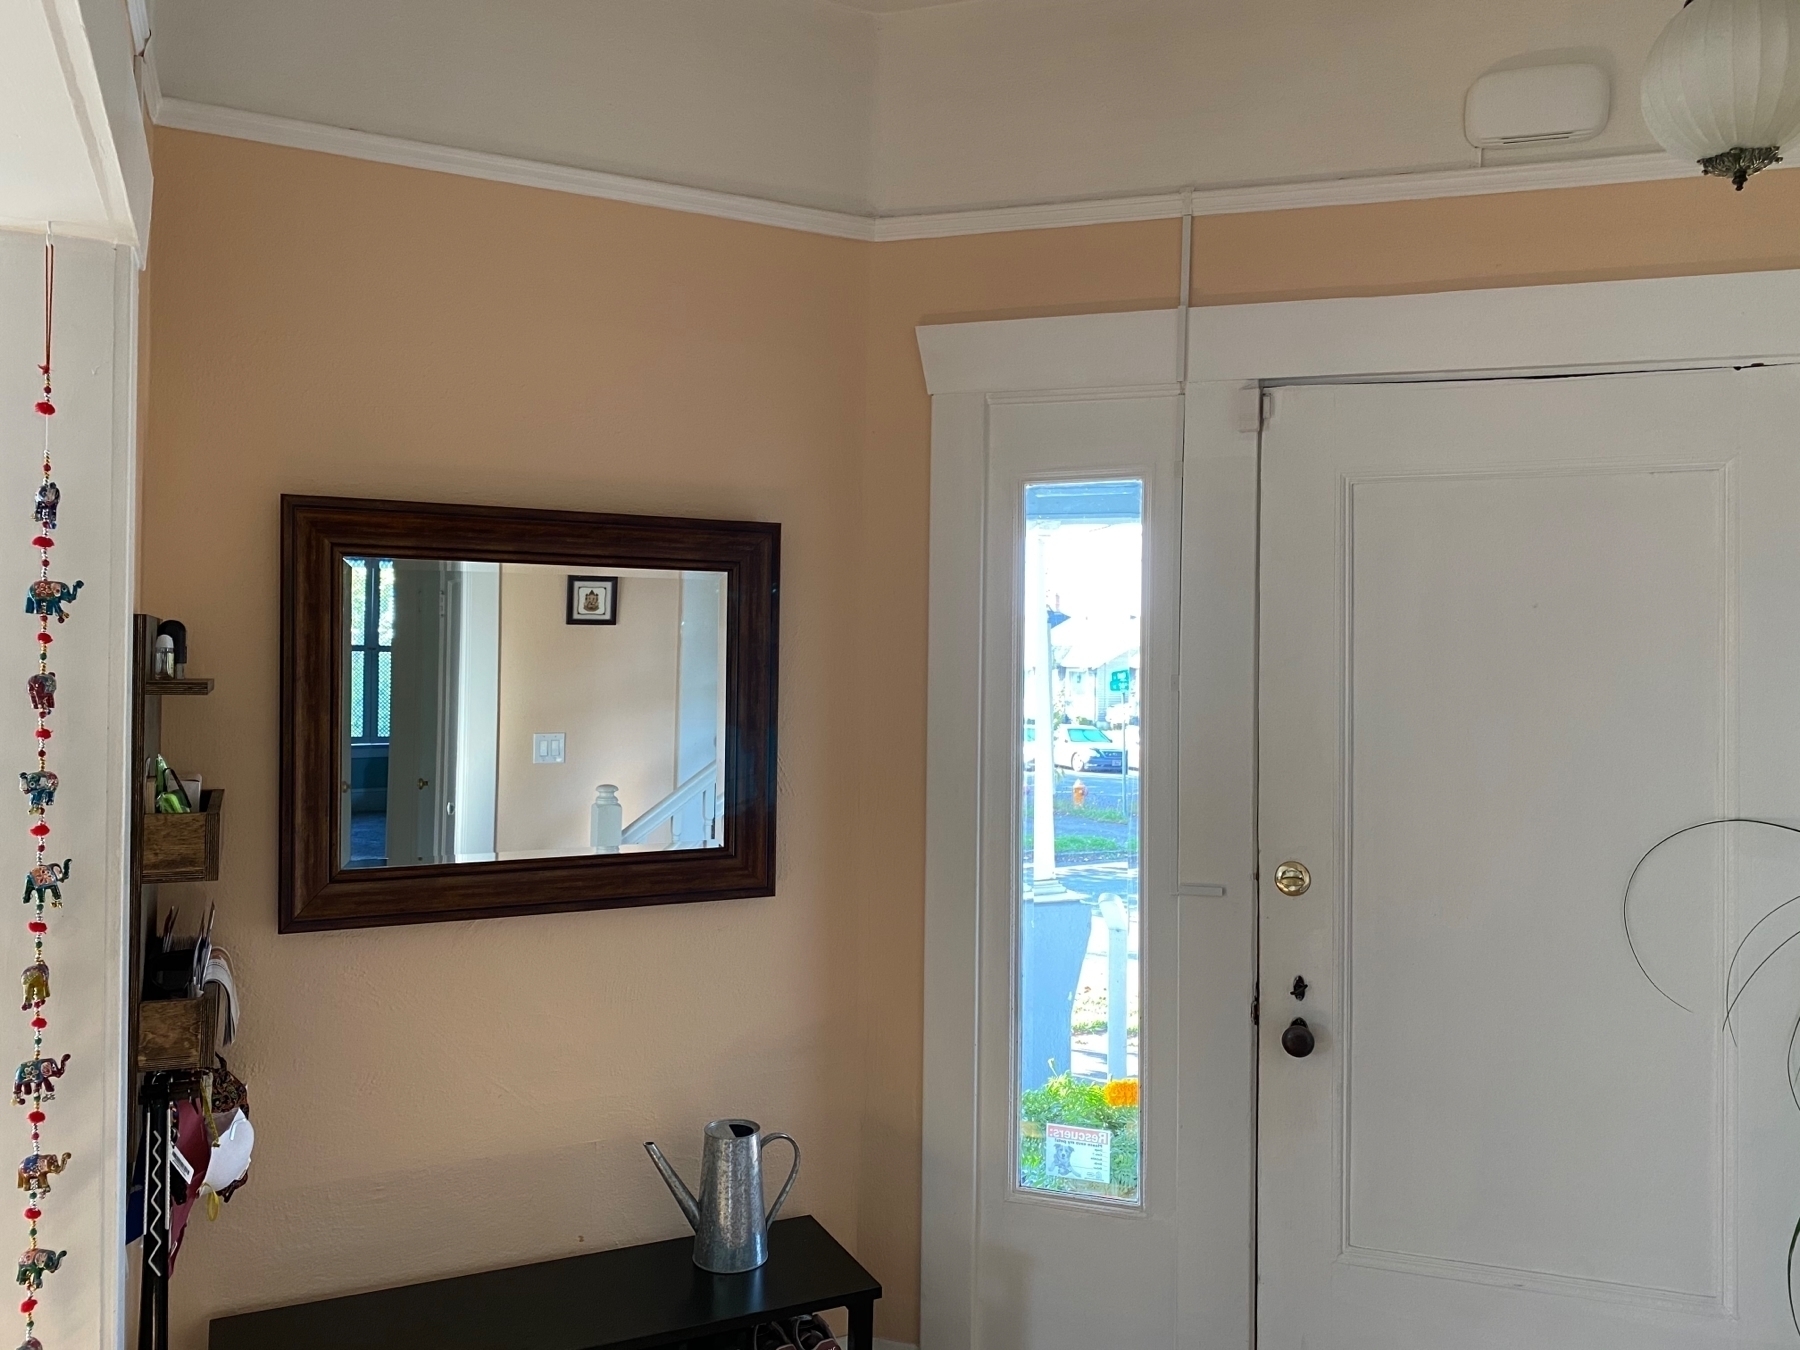
Now all I had to do was to clean up and conceal the wiring. I didn’t have anything for this so I researched some more and ordered some cable concealing strips. Once those arrived I set about cutting pieces to length and enclosed much of the wire by the door with it. I also hid some of the wiring in the moulding along which I had run it. That was handy and probably cut my concealing cost in half.
So far the experience has been nice. There’s still issues with the integration of the app. The notification always fires when the doorbell rings, but live video and audio can be cut off some times. These are software issues and I hope they get resolved soon. A new app update came out while I was writing this post and that greatly improved the performance of showing video right after launching the app. It’s good to know they are making improvements like I had hoped.
In these pandemic days it’s mostly just package delivery people coming by and I’ve noticed that only about half of them ring the doorbell. There have been no times when I’ve needed to talk to someone. I’m still dialing in the right motion triggers and sensitivity so I can minimize the false positives. Once that is the case I may even enable notifications for all motion events, if needed. There have been one or two cases when the delivery person delivered something on the porch and didn’t trigger the motion sensing. Hopefully those will get ironed out. I can still see those because I’ve set things up to record all video on a buffer that lasts several days. The interface for recorded video is great and makes it really easy to look at relevant events which get logged.
Overall I’m pretty happy with it. It was an interesting project where I tackled and solved problems that were new-to-me and that’s always the best part.
Images uploaded using Mimi.
We made a raised gardening bed last weekend, filled it with dirt yesterday, and Jenni planted yummies today.